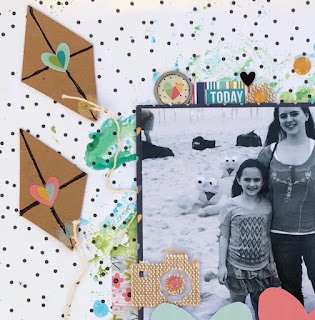
Supplies i used:
*. Simple Stories domestic bliss collection kit
* Simple stories domestic bliss enamel dots
* Simple Stories diy burlap shapes
*. Simple Stories diy tag foundations-kraft
*. Simple stories domestic bliss epoxy metal clips
*. Simple stories domestic bliss washi tape
*. Simple stories domestic bliss clear stickers
*. Simple stories label stickers from my stash
*. Prima watercolor paints- classics
Tools:
• Paper Trimmer
• Scissors
• Pop-dots
• Score-tape double sided adhesive
• Black sharpie marker
1. Gather all your supplies
2. Start the simple stories domestic bliss collection kit
3. Take out the black and white speckled paper
4. Take out your water paints and water-brush
black and white speckled paper then repeat with green ( I also mixed the turquoise and green to get the navy green color as well)
5. Next take one of the diy kraft tag and cut on a angle starting from the string hole on both sides
6. Then turn it around and cut on a angle on both sides
9. Fussy-cut the large hearts out and set aside
11. Find the small colored heart paper and trim it down to just slightly larger then your picture
13. Adhere to the center of your watercolor sploched area
14. Add two kraft kites to the left of the picture and one to the right of your picture and adhere them
15. Add a piece of the scallopped sticker strip from the cardstock stickers sheet in the collection kit and glue below bottm edge of matted pic
16. Tear off some pieces of washi tape and add the the sides of the pic.
17. Take those fussy cut hearts and add some foam dots behind it and adhere to the bottom of pic.
18. Take your stickers and embellies and layer around the frame of the pic as you like
19. Add a camara burlap sticker with an enamel dot to the left corner if you like this look
20. Add a cluster of stickers to the bottom right to offset the heavy embellishments on top of the paper
21.scatter enamel dots around the page in coordinating colors to finish the look
22.lastly, trim ¼ in off the top and left of your page ( only if you like this look- personalize your page) and
add a contrasting yellow pattern paper behind toframe the corner of the page
Thanks for stopping by and happy creating!
Jennifer Taylor


Such a fun layout!
ReplyDeleteWhat a cool layout! Thanks for the tutorial!
ReplyDeleteThank you!☺️
ReplyDelete