Shop FotoBella

Shop for Scrapbooking Supplies by Product Type Shop for Scrapbooking Supplies by Brand Shop for Scrapbooking Supplies by Layout Theme Shop for Scrapbooking Supplies by Color

Search This Blog

Sunday, December 30, 2012

*Tutorial* TP Roll Christmas Brag Mini!

Hi Everyone!
Everyone loves to recycle, right?! I sure do love to create with anything I can get my hands on, including toilet paper rolls!

Yes, that’s right! TP rolls! Save them-your local schools lov’em, too!

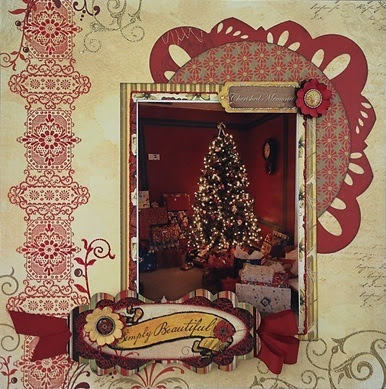
Ok-in all seriousness these little rolls are perfect for mini albums and brag books like this one I made.


So, are you ready for the tutorial? Grab your favorite cup of Joe and let’s get started!

1.First, I flattened out each TP roll with the palm of my hand.
2.Then, using the edge of my score tool crease the edges.
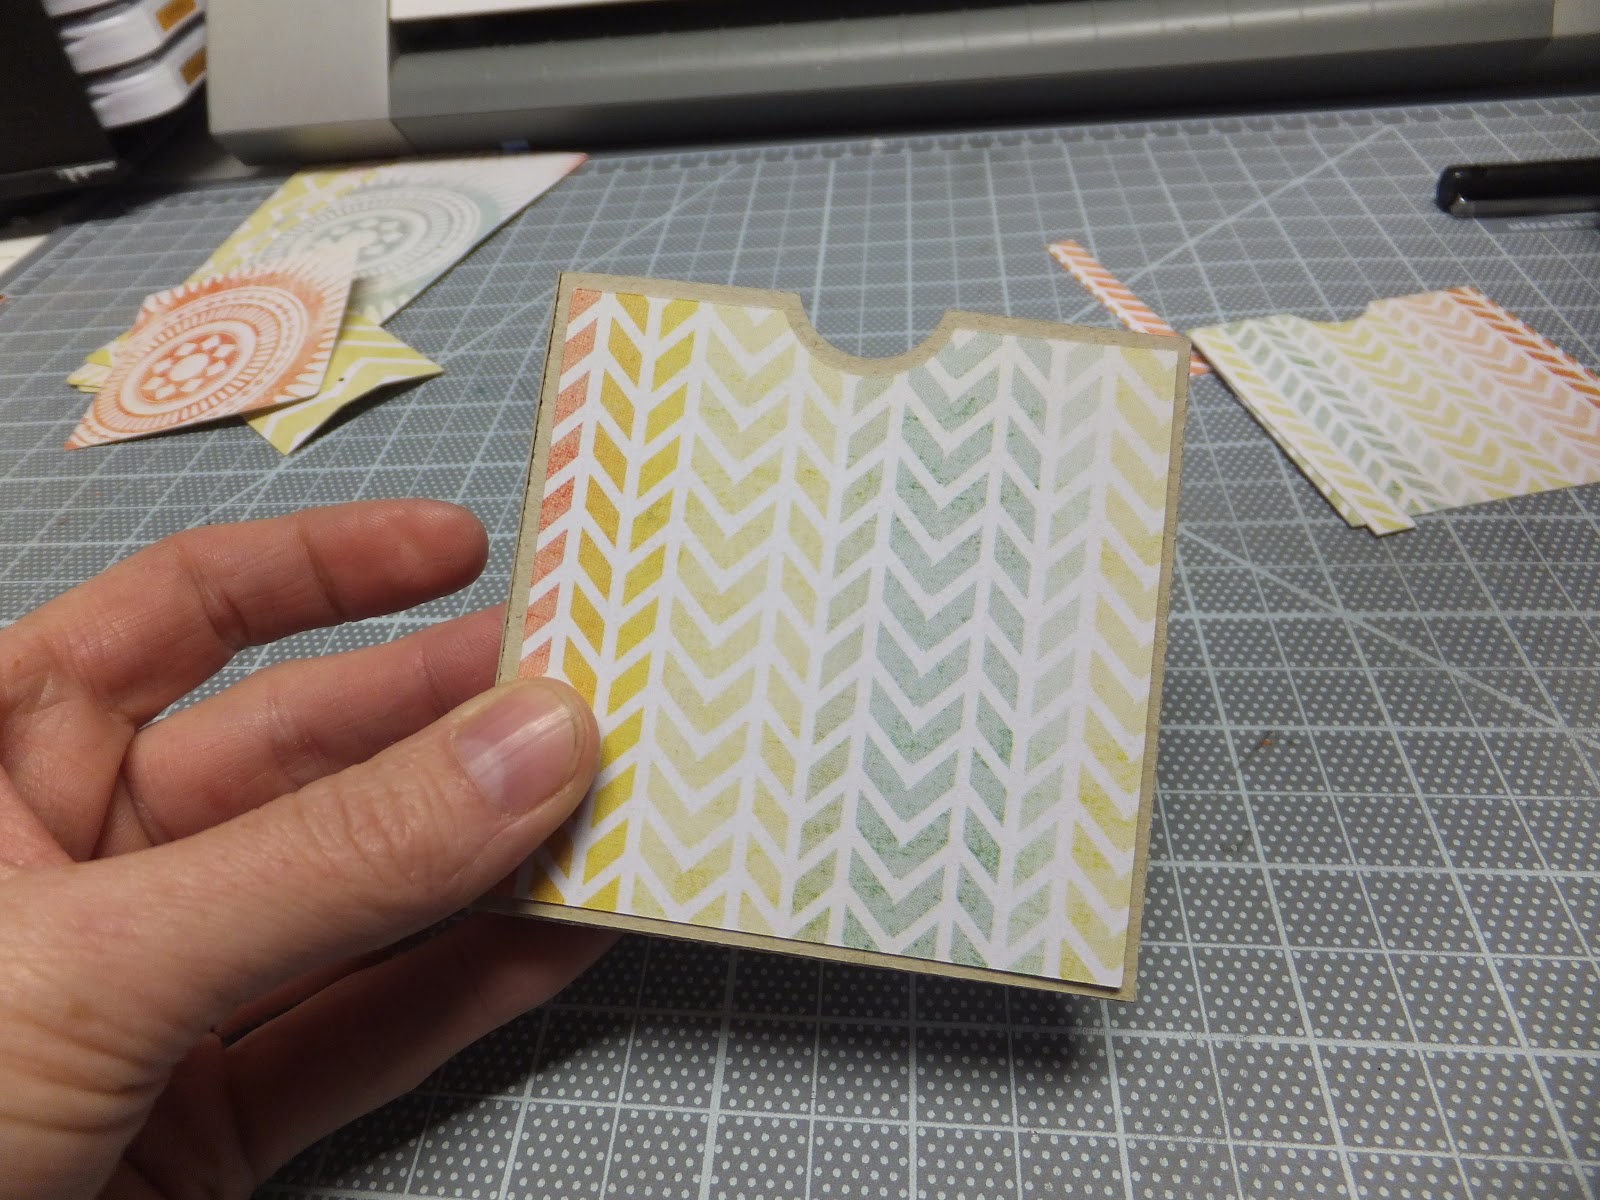
3.Cut the pages 2.5” x 4” rectangle
4.Adhere tape in the middle only
5.Place page on top of the TP roll on each side.

6.Sew as close as you can to the top and bottom sections.

After sewing...

7.Add tags to each pocket
8.Each tag measures 2” x 4.25”

9.Embellish with frames, Cardstock stickers, etc…go crazy with your kit’s goodies!


10. Also, I have a video to show you the complete Bundle in person and another video how to make the flowers and tags.

Complete Bo Bunny Mistletoe Bundle and what you get!
Watch Video Here!

Video Tutorial: How to make the Flowers and the Tags!

Now scoot on over to FotoBella’s shop and grab your Bo Bunny ‘Mistletoe’ Bundle and start Craftin’-Your family will appreciate you do ;)

Thank you for stopping by and visit soon for more of my gift-giving project ideas and have a fun and safe holiday!

Hugs and Blessings,

2013 Pocket Calendar: My Mind's Eye Tangerine Together Bundle


Hello Crafties.....

Sarinda here from the Fotobell.com Design Team.
I wanted to share a 3"x3" pocket calender for the new year.
There are a few steps to this project... But don't let that scare you away. 
I just wanted to make sure I covered all the details for you.
I had a lot of fun making this one and hope you will too.
Enjoy-!
Sarinda

Supplies:
·       Sticker sheet
·       Enamel Dots
·       Chevron Paper
·       Round Paper
·       Glue
·       Orange bakers twine
·       Small letters and numbers
One sheet of Kraft cardstock
Photo Sizes:
·       N/A
Tools:
·       Silhouette Cameo

Step 1:

1.     Get your Silhouette ready and make sure you have downloaded the current software version. This is important.
2.     Find the correct files. Open up the Silhouette store window and look for these files and purchase them.


Find both the calendar downloads.  Just so you know that this is really easy and Silhouette has a step-by-step instructions in the program. All you have to do is just follow. 

3. In Silhouette open two different windows, one for each calendar. These are a print and cut… You will need to make sure you have clicked on the Registration Marks Settings Window. In the upper right corner of your screen. Click on the print button next to the cut button on the left side of screen. Once printed, put paper onto sticky mat with the circle in the upper left corner of mat. Then load into the Silhouette. Be sure that the Silhouette reads the registration marks. I do this manually; it just seems to work better for me. Click to use manual option in the right Column. Arrow up and down side to side to get the cutter right over the dot. Then send to be cut.
 
4.   Find the Pattern paper with the circles load it into the Silhouette machine. Open another two windows in the Silhouette software. Find the download for the book and pages. Click on the one with the pages. Scale everything down to 3”x 3”. Ungroup everything, Highlight one of the pages and make a duplicate then rearrange everything on your page to accommodate the new page. (I chose to omit the single square) Then Cut.


5.     Find the Part two to the 3D album the box. Scale everything down to 3”x 3”. Ungroup everything. Move the cover panels to the side. Load the Kraft cardstock into your Silhouette and cut out box.
6.   Go back to Silhouette software page and move the box to the side. Move the covers of the box into the print field. Select one of the long rectangles and make a copy of it, This will make three in total. Find the chevron paper load it into the Silhouette and cut.


7.   Here are all your cut outs…. 4 pages, three rectangle strips, two covers, binding yellow chevron, 2 Kraft box pieces. Note: I discarded the orange rectangle.


8.    Assemble the box. Crease all perforated areas to one side. Then glue the sides of the box together and hold. Then glue the bottom flap inside the box.


9.  Glue the cover panels to the box as well as all three of the rectangles.


  10. Find your cut out pages. You will notice that there is one center that is wide, two with medium centers and one with a small center. Crease them and stack them with the largest on the outside and small in the center. 

11.   Find the largest one and this is your cover. Take the yellow chevron binder and glue to the front of your book.
BE SURE TO LINE UP THE HOLES.
Note: Once everything was how I wanted it
I put some glue down the center of the pages to hold it better.  Then add it back to your stacked pages.


12.  Take a fair amount of twine and lace it through the bottom holes starting on the inside of your book. So that the ends will be on the outside of the book.

 
13.  Lace the other side. Tie in a bow with a double knot.

 
14.  Find your calendar cut outs and start gluing January to the first page of your book and so on.

15.  Decorate the cover of your box. Find the “You & Me” tap sticker and place it on the right side. Also locate two photo corners: Place one on the upper left side and one on the lower right side.

 
16.  Find some Numbers and letter stickers… Whatever you have in your stash will do. Spell out 2013 Calendar.

17.  Find the Enamel dots. Use one large orange, one medium yellow and a small pink place in the bottom left corner.
 18.  Congratulations: you have completed the stunning 2013 pocket Calendar. I made a few of these for the gift-giving season. 


Friday, December 28, 2012

Butterfly Carried Away Tag My Minds Eye The Sweetest Thing

Hello!  The collection I have had the pleasure of working with this month is My Mind's Eye The Sweetest Thing Tangerine Bundle.  From that bundle I have chose to make a tag with the "Together" theme of the collection.  The pink, green, yellow and orange combination in this collection is really beautiful.  I was inspired to make this tag by the butterfly stickers on the "Together" Sticker Sheet.  However, I made my butterflies using the Lifestyle Crafts Butterfly border die.  I used the single small and large die that are included with the border die.   


I cut the small butterflies out of the patterned paper in the "Together collection.  The large butterflies were cut out of a scrap of pearlized white cardstock I already had in my stash. 

The butterflies were adhered using pop dots and embellished the butterflies with aqua and gold Stickles.


The base of the tag is cut from the piece of cardstock that is the backing in the enamel dot packaging. 


I then covered the white part of the tag with the floral decorative tape and trimmed around the edges with an Xacto knife.


I then wrapped the bottom of the tag with frilly, sheer, pink ribbon.


I punched a hole in the top of the tag and tied a sheer, aqua ribbin through it.  I used the same ribbon to make a bow and adhere to the bottom left of the tag.   


Hope you enjoy this beautiful tag.


Thursday, December 27, 2012

Simply Beautiful with Bo Bunny Serenade


Hello,

This is Apryl with Fotobella Design Team.  Today I am sharing with you step-by-step how to re-create this layout:


This layout was made with the BEAUTIFUL Bo Bunny Serenade-I Want It All Collection found at fotobella.com. 

  Supplies:
·         Paper:  Cutouts (Side B), Dragonfly (Side B), Stripe (Side B), Garden (Side B), Poppies
·         Combo Sticker Sheet, Brads, Petals
·         Xmas Red Stickles
·         Gold Stickles
·         Pop Dots
·         Dark Red Ribbon
·         Black Ink
Photo Sizes:
·         5”x7” Portrait
Tools:
·         Lucky 8 Classic Wreath Punch (also sold at Fotobella)
·         Circle Cutter
·         Stapler
·         Paper Trimmer
·         Paper Piercer

1.       Select BoBunny Serenade Collection.
  
  
 2.       Choose the following paper: Cutouts (Side B), Dragonfly (Side B), Stripe (Side B), Garden (Side B), Poppies.
 3.       Select the Dragonfly Paper and measure and mark it at 9”x9”. 

 4.  Trim the paper down to 9”x9”.

 5.  Using the Lucky 8 punch Classic  Wreath.  Set the cut settings to “on” for the Outer Cut and the Inner Cut.
6.  With the red side of the paper facing up, begin punching all four corners. 


9.  Ink the edges of the shape with black ink. 


 10.  Select the Cutouts Paper Side B and your circle cutter tool. 
  
                      
 11.  Cut out a circle that is 6” in diameter. 

12.  Matte your photo in white cardstock, matte with Poppies paper and then matte a third time with Garden Paper Side B.  Place the photo on top of the Circle as shown. 
                            
13.  Select a dark red ribbon and gather three loops together.  Use a staple to secure the loops at the base (where my thumb is holding the ribbon).  Do not cut the ribbon tails. 
  
 14.  You will want to leave the ribbon long enough to place the Simply Beautiful Sticker on top with two ribbon tails showing on the left of the sticker. 

15. Using pop dots, adhere the Simply Beautiful Sticker to the bottom left hand corner of your matted photo.
16. Select a small red and yellow flower, layer and attach with a brad. Using a glue dot, adhere the flower embellishment so that it covers the small red flower to the left of the word “simply” on the sticker. 


17.  Select the sticker that says “Cherished Memories” from the 12x12 sticker sheet.  Using pop dots adhere the sticker to the top right had corner of the matted photo.  Select a small black and red flower, layer and secure with a brad. 

18.  Embellish the layout with Xmas red and gold Stickles.


Hope you enjoy this beautiful layout you just made!
  
Have a very Happy Holiday!