Shop FotoBella

Shop for Scrapbooking Supplies by Product Type Shop for Scrapbooking Supplies by Brand Shop for Scrapbooking Supplies by Layout Theme Shop for Scrapbooking Supplies by Color

Search This Blog

Tuesday, October 28, 2014

Basic Grey Evergreen Double Page Layout

Welcome!  Jessica here today sharing a double page Christmas layout I created.  It is rare for me, I know.  I just have so many pictures from going to the Botanical Gardens at Christmas time that I wanted to do two pages.  These five pictures don't even put a dent in how many I took but they were some of my favs.

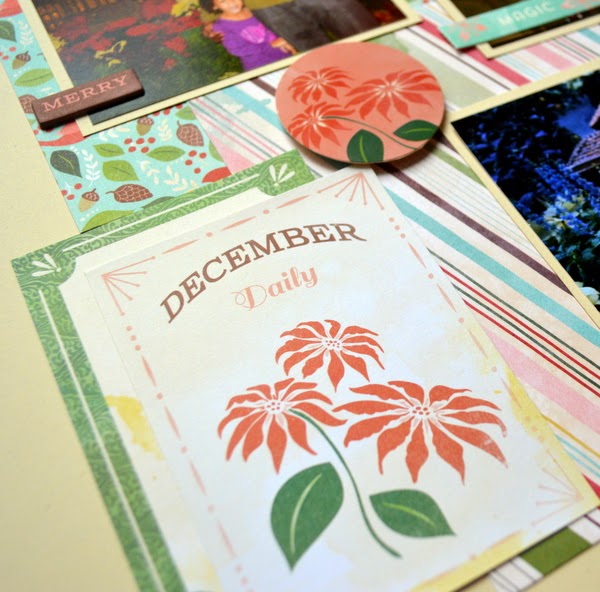
I used the Basic Grey Evergreen Bundle from FotoBella to complete this layout. One of the main attractions at the gardens are all the different species of poinsettias.  When I received this bundle in the mail, my brain went right to these pictures.  I pulled a lot of the poinsettias embellishments out to complete the layout.

Overall:

A few close-ups:


Have a beautiful day! Smiles, Jessica

Saturday, October 25, 2014

Halloween Banner and Frame

Are you getting ready for Halloween?  I know I am.  I have used just about all of my MME Frightful Bundle this month to create Halloween decor for my home.

Today I wanted to share with you a banner and photo frame I did using the ready to frame 8x10 set. When I was trying to figure out what to do with the these, a friend gave me the great idea to turn them into a banner.

I selected three of three of my favorites and punched two holes in the to of each.  Then I cut two 6x8 pieces of paper and punched two holes in the top of those.  I alternated the 8x10 and 6x8 and threaded some ribbon through the holes.  Then on each of the 6x8's, I created a little cluster of embellishments with handmade flowers I cut from my circut.  Easy as pie.

I then hung my pumpkin and ghost from this post right below it so my house is ready for Halloween.


A few close-ups:


Now, sitting on the bookcase right below the banner is this picture frame.  I picked up an 8x10 black picture frame at the dollar store.  I added in one of the 8x10 ready to frame pictures and then added a few embellishments and more of the handmade flowers.  Another easy as pie decor item.

A few close-ups:


And with that, I am ready for Halloween this year with a bunch of handmade frightfully beautiful decor items.  It is not to late to grab that bundle and make your own items.

Have a beautiful day! Smiles, Jessica

Wednesday, October 22, 2014

Altered Wine Decor

Apryl here with FotoBella's design team. When I think of Prima Marketing products, altered projects immediately come to mind for me.   Prima has so many fun embellishments that lend itself to such great creativity.  


I found a basic black wine cork holder at Big Lots and went away to work on it with the Forever Green Prima bundle.  There was a blank area at the front that allowed me to place the "it's the little things" title in the center of the piece.  


The flowers, stick pin embellishments and rhinestone gems are simply beautiful!


I tied some raffia at the bottom with a flower to add the finishing touch.


This will make such a great Christmas gift this year for a wine enthusiast.  Who doesn't love something fun and decorative for collecting corks?  Visit FotoBella.com to get your Prima Forever Green bundle and get started on a fun altered project of your own.


Monday, October 20, 2014

Let's Get Out There Altered Frame

      Hello, glad you could join me today for a fun altered frame tutorial.  Apryl here with FotoBella's Design Team. Check out the I Want It All Bundle I'm featuring, Prima Marketing's Forever Green Collection.  


      It is a great collection to have if you are really into altered projects.  I went to Big Lots and just got a plain old black, 4"x6" frame.  Here are the steps to re-create this frame:


1.    Select the “Watch Them Grow” patterned paper.


2.    Place the frame face down on the paper and trace the outer and inner edge of the frame.  Cut the pieces out and be sure to cut a diagonal at each corner.


3. Begin glueing the cut pieces to the front of the frame.  Be sure that the angles at the corners line up, as well as the words in  the pattern of the paper.


4. At the top left corner of the frame, begin building your embellishment by layering several leaves from the “Vegetation” packet of leaves.


5.  Add the olive green flower from the “Sprout” flower packet.  It’s the flower with the feathers behind it.  Place the bird stick pin behind it.  In the center of the flower, remove the pearl in the center and glue the wood “hello” circle embellishment from the “Wood Icons” packet. 


6.  At the bottom right hand corner of the frame, begin layering leaves as you did in the other corner. 


7. Build the embellishment using the burlap flower from the “Mushroom” packet.  Fussy cut the ampersand from one of the journaling notecards to place behind the flower.  Add the butterfly sick pin, the metal bird cage charm and small flowers to the frame.  Also added some fun pieces from the Epherema packet such as the word “explore” and some flowers and leaves.  


8.  For the display area of the frame, insert the journal notecards with “Let’s Get Out There” which fit perfectly in the 4x6 opening of the frame. 


Supplies Needed:  Prima Marketing I Want It All Bundle:“Watch Them Grow” Paper, Ephemera, Wood Icons, Vegetation packet, Stick Pins, Metal charms, Small Flowers and a black 4”x6” frame.


Friday, October 17, 2014

Christmas Collage Santa Layout

     This Santa image is my favorite piece of paper in Bo Bunny's Christmas Collage I want it all bundle from FotoBella! I just had to use it, so I'm back with another page that I scrapped of my son when he was just 6 years old.


     I also wanted to use the film strip, which I didn't get to use in my previous projects. It worked great with this fabulous sketch from Bo Bunny.


     I did a lot of distressing, misting, machine-stitching, and inking on this page, including the title stickers, which I inked along the bottom in red. It really helped to pop it out. All of the buttons came in the Ephemera package, except for the little yellow one, which I got in the Christmas Collage Buttons pack. The tag was cut from patterned paper, and the fibers on it came from my own stash, along with the candy cane and holly leaves.


     I used the Memories Chipboard on the bottom of the Polaroid, and inked the edges in green. This bundle works really well for all of your holiday memories, old and new!


Wednesday, October 15, 2014

You're My Everything Card


Creating a masculine greeting card can sometimes be challenging.  The Prima Forever Green collection at FotoBella offers some great options for card designs, and masculine is one of them.  


I chose the "you're my everything" sentiment, matted it in white card stock and popped it up from the back ground so that I could place some fun raffia behind it.  I fussy cut some ferns a tucked those behind the sentiment as well.  I could't resist adding a little bit of bling, so I added two rhinestone gems on either side, mixed in with the raffia.  It was just the right touch.

Simple yet beautiful and a great card for the man in your life.  


Monday, October 13, 2014

Christmas Collage Card Tutorial

     The new Bo Bunny Christmas Collage I want it all bundle, from FotoBella, is so beautiful and festive!! It's never too early to get started on your Christmas cards, like the one I made here.


Supplies from Bo Bunny Christmas Collage I want it all bundle:
- Christmas Collage Ephemera
- Christmas Collage Noteworthy
- Christmas Collage Brads

Other Supplies:
Red Cardstock
Mists
Ranger Embossing Powder (Topiary)
Distress Inks (Pine Needle and Festive Berries)
Glue

Tools: 
Heat gun

Directions:

1. Cut the cream paper with the music notes on the back, from the Ephemera Package, to 5 1/2" x 6". Tear the sheet music that also comes in the package, along the music notes, and glue just the middle of the strips down. Spray with some mists. I used Lindy's Stamp Gang (Rudolph's Red Nose and Clam Bake Beige). While it's still wet curl and distress your edges. 


2. Use the stamps that also come in the Ephemera Package to emboss the leaves on the bottom left. I used Ranger's Topiary Embossing Powder.


3. Tear around all of the edges and ink with Distress Ink (Festive Berries). Wet the edges and distress them even more by curling them up.


4. Tear and distress the edges of the horse and sleigh image that comes in the Noteworthy package, and glue it to the middle.


5.  Cut the green paper from the Ephemera Package at 6 1/4" x 4 3/4". Ink the edges with Distress Ink (Pine Needle) and glue to card cut from red cardstock at 6 1/2" x 5".  Attach brad to the image and glue onto the green paper. Now just add the flowers and bling which also come in the Ephemera package.


Thanks for your visit!


Friday, October 10, 2014

Bo Bunny Christmas Collage 2 Pager

     Bo Bunny's new Christmas Collage I want it all bundle from FotoBella, is so festive, and packed full of everything you need for all of your holiday photos and projects! I created this 2 Pager with some photos of a visit from my uncle, aunt, and cousin, at my parents house.


        I had a lot of fun embellishing these pages, using the Layered Chipboard, Ephemera, Brads, and Chipboard to create the banner and cluster under the large photo.


     The scallops were fussy cut along the bottom, and then I punched the holes with my Big Bite, inking the edges with Distress Ink (Fired Brick).


    I added some machine stitching to finish it up. Thanks for your visit!


Wednesday, October 8, 2014

Hello Layout

We recently visited the Grand Canyon and wow, what a beautiful experience.  Here is one awesome photo from our trip.  Prima's Forever Green collection was the perfect match to this photo.  I didn't want to do too much to detract from the awesome photo.  I  chose the papers and colors carefully.  


The "hello" is from the journal cards pad in the collection, along with the pink and orange card stock. I mirrored the "hello" cards to emulate the endlessness feeling of the Grand Canyon and the continue echoes that ring through it.


The mason jar journal card I fussy cut, along with the butterflies and placed them on the page to appear as though they are escaping from the jar and into the Grand Canyon.  


I have a ton of photos from our trip and great memories to preserve using the beautiful Prima collection from FotoBella.  I'm sure you do also, get this bundle and have a ball putting your layouts together.


Monday, October 6, 2014

Bo Bunny ~ Christmas Collage Layout

     This old photo of me and my cousins from the 70's was just meant to go with the new Bo Bunny Christmas Collage I want it all bundle from FotoBella! I'm the one on the right.


     I started by masking a doily stencil using Distress Ink (Festive Berries). Then I used another stencil with gesso to create the dots on the background. I fussy cut the circles and medallions from the paper, and added buttons to them. I also added the star button to the chipboard  ruler tree, which I inked in green around the edges.


     The banner is also made from chipboard, and I added the year on it using the stickers that come in the 12 X 12 collection pack. I embossed 25 onto the red paper and hand-stitched around it, adding the DEC chipboard on top. I also hands-stitched around the photo, and the circle image, of a girl hanging an ornament on a tree, which comes in the Noteworthy package.


     The holidays will be here before you know it, and this collection is perfect for all of those photos, old and new.


Saturday, October 4, 2014

World Card Making Day 2014

Hello Crafties!
What a wonderful day to celebrate the creative mind. 

We encourage everyone to join in and celebrate today by creating cards for any occasion!
Come back and show us what you come up with and we will share some on our facebook page.

Here are just a few from our Design Team this year:


Have fun creating!