


Hello Fotobella.com Fans! Christi here from Scrapping For Tranquility with my 3rd post, as Guest Designer for September on Fotobella.com's blog.
When I received my GDT box I received a Wood Effect Stencil by Stamperia, a Lucky Clover Ranger Distress Spray Stain and some Brown Prima Wire Thread. These were three items I kept thinking, What the heck am I going to do with these? I kept racking my brain and here is what I came up with! Enjoy!
SUPPLIES:
Picket Fence Distress Spray Stain
Tools:
Cutting Machine of your Choice along
with SVG file to cut the pieces
Pallet Knife
Heat Gun
Quilling tool and/or pencil

Cut
all your Pillar Pieces for the pillar on your cutting machine of choice. I bought this particular file from My Scrap Chick.

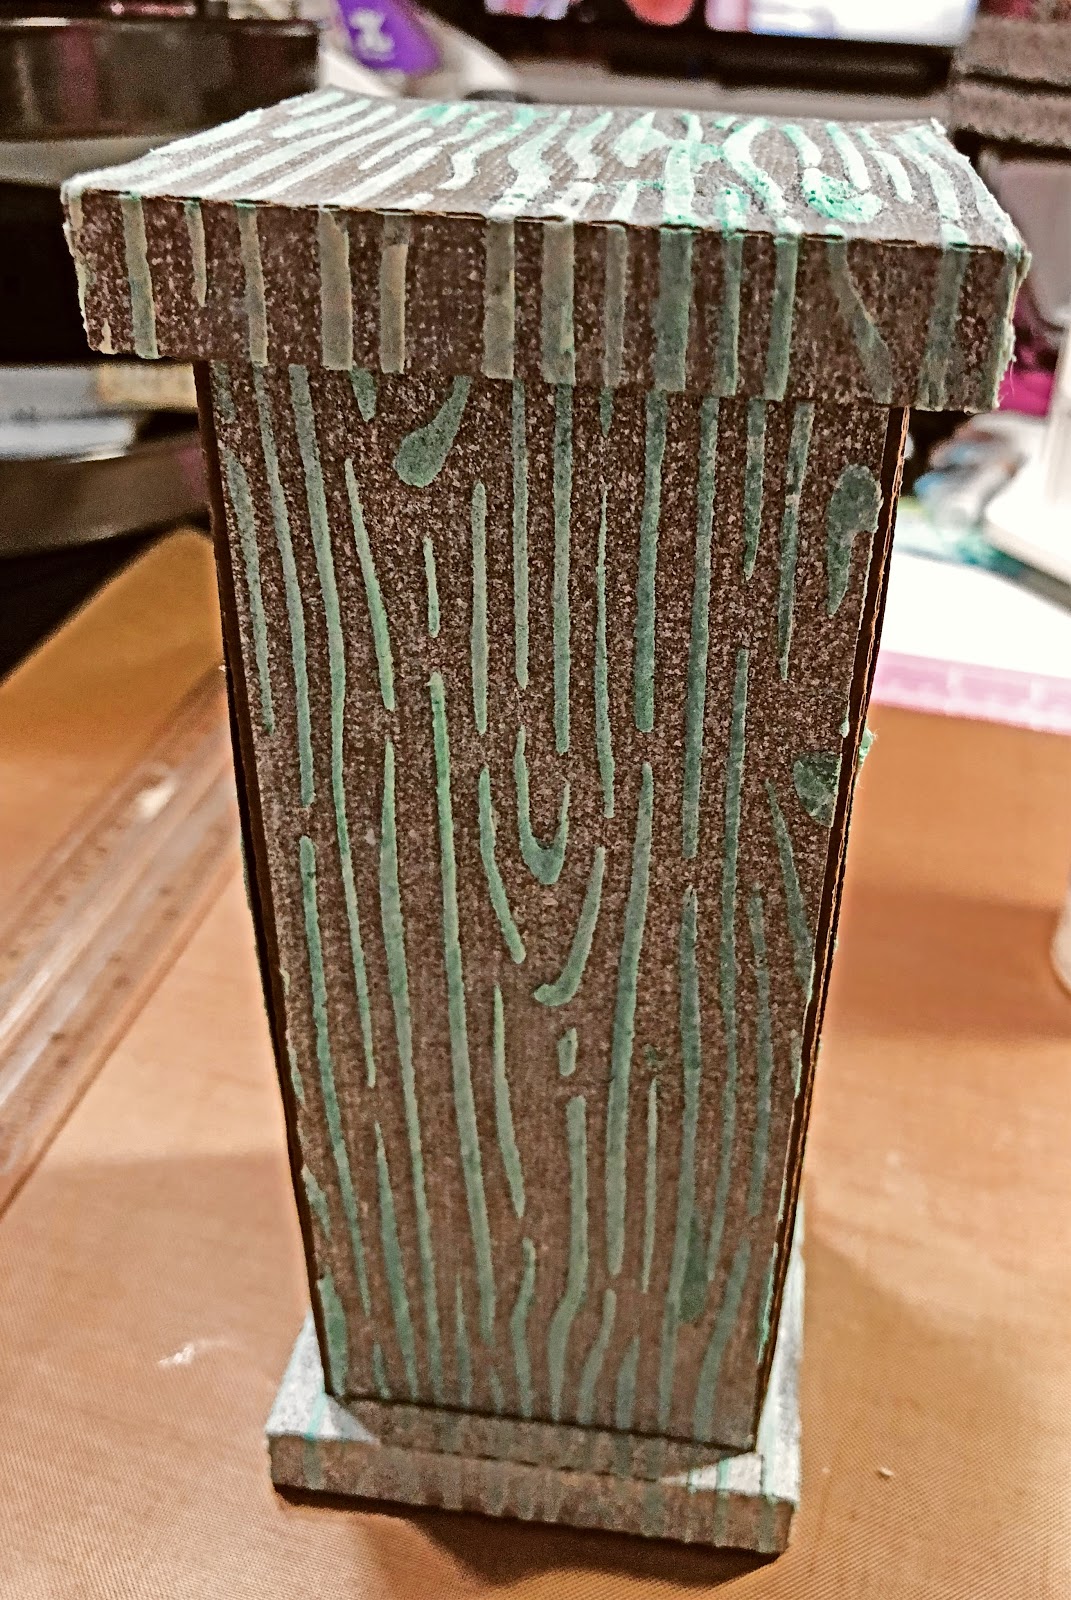
Place
the Stamperia Wood effect Stencil on the Brown Cardstock panels for the
pillars.
Apply the Texture Paste with the pallet knives.

Gently
pull from one corner of the stencil up and off the cardstock to reveal what the
texture paste left on the cardstock

Using
your heat gun, dry the texture past and watch it raise a bit to give you the “texture”.

Using a box for a “spray room” to catch your over spray,
lay your panels in the box.
Lightly spray Ranger Distress Spray Stain, Lucky Clover.

Again,
using your heat gun, dry the distress stain until completely dry.

Once your Ranger Distress Spray Stain, Lucky Clover is completely dry, it is time to lay the panels out in your spray box to put a spray
layer of Rangers Distress Spray Stain,
Picket Fence.

Taking
the heat gun, completely dry the Picket fence layer.
Once
it is dry, determine if you need another layer of picket fence. If you do, repeat steps 8 & 9.

Repeat
all steps above on the top and bottom of the pillar and then fold on perforated
lines.

Glue
the top and bottom parts to form the “box–like “ forms.

Glue the
base of the pillar together

Glue the
wood panels that you textured and stained onto the base of the pillar.

Placing
glue on the tabs on the bottom of the pillar, place the pillar into the bottom
square you made.
Placing
glue on the top tabs of the pillar, place the top square you built onto the
pillar.

Using Prima
Wire Thread, bend it around the pillar for a “3 D VINE effect” around your “tree”.

Finally, adding leaves from the Bo Bunny Foliage Laser Cut Chipboard .I top it off with taking my quilling tool and wrapping the Brown Wire Thread by Prima around it to make it look more like curled vine.
Let's

I added battery operated candles from Dollar tree.
Here is they are in the light:

I REALLY love the way this project came out. Let me know what you think by leaving me a comment below!
Blessings,

 |
| Scrapping For Tranquility |
No comments:
Post a Comment