|
Picture it! Delicate clouds of white lotus fill the sky. Outdoor street markets are alive with dangling lanterns and vivacious colors. Original, angled rooftops and architecture line the streets … You must be in Japan! Welcome. Or, more appropriately, “Konnichiwa!” Fill your mind with wonderment and the beautiful spirit that is found in this unique collection of mesmerizing fuchsia, cherry blossom pink, bonsai-tree green and soft sky blue.
Quick & Easy Gift Box
I love making custom packaging for
gifts. I find its more personal, more meaningful and you can make it as simple
or detailed as you want. You can also customize packaging specifically for
someone, which will definitely get you kudos!
I found a double-sided page I loved,
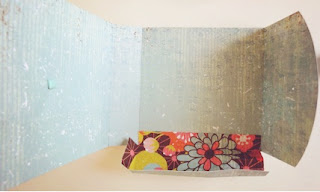
and drew out the main box and the sides.
Cut out the pieces. Since this is
cardstock, I recommend using a straight edge to help you make perfect folds. On
each end piece, cut out the bottom squares from each corner. This will help the
piece fold and sit better.
Then pinch the top part of the side
piece.
Use the straight edge to fold the
main box piece.
Proceed to glue a side tab to the
box. I used a simple glue stick. Make sure to line the pieces up evenly so you
cannot see unevenness in the finished box.
Go ahead and attach the other side
piece. Fold the bottom of the box up, and glue the small bottom tabs of each
side piece.
You can then glue the side tabs to
the front box flap. This is a little more difficult, so make sure to be patient
and line them up. I used a round ruler
to make a curved edge on the box flap and cut.
Then decide where you would want your ribbon to be, depending on the size
of ribbon you use. Measure and make sure they are centered. You can then fold the flap onto the box and
line those holes up. I punched holes, and pushed the ribbon through from the
inside.
Fold the flap down, and push the
ribbons through the holes. Close the box and tie the bow! Adorable custom gift
box!


Wonderfully Done...
ReplyDeleteSo beautiful.
sarinda
Thank you! What a fun package, I loved it!
DeleteThese designs are very useful to me because I really like them, so thank you for sharing this information. When I was in university, I used to create a lot of designs because I love designing. As a result, my dissertation was left incomplete, and I had to
ReplyDeletebuy online dissertation service, which helped me a lot.
These designs are incredibly helpful—thank you for sharing! Back in university, I spent so much time designing, which I truly enjoyed, that I ended up falling behind on my dissertation. Eventually, I used a buy dissertation online service, and it really saved me.
ReplyDelete