Hi again! It's Annie and today I'm sharing a tutorial for a handmade travel journal made with PhotoPlay's new Here & There Collection. You can use this fun book to keep your photos and memorabilia safe, record your thoughts, or even sketch during your journey.
Start by trimming two pieces of Café Ole cardstock to 9” x 11.5”. Score each piece down the center.
Adhere the two pieces of cardstock together using a thin layer of liquid glue with the textured sides facing outward. Fold the cardstock on the score lines and round the top and bottom right corners with a corner rounder.
To create your section dividers, trim two pieces of Ecru cardstock to 8.” X 11”, score both down the middle and round the right-hand corners. Pages can be created using copy or sketch paper, trimmed/scored in the same way. (If you make a very thick journal, you may need to remove ¼” from the inner pages to keep them flush.)
Trim two pieces of luggage tag patterned paper to 8.5” x 5.25”, round the corners, and ink the edges with brown ink. Line the inside of the cover with these panels using liquid glue.
Mat the luggage tag cardstock sticker and the ledger patterned paper with Espresso Bean cardstock and adhere to the inside of the front cover with liquid glue.
Trim out two more decorative panels from the patterned cardstock in the collection (3” x 4”), mat them with Espresso Bean cardstock, and adhere to the front cover as shown. Arrange the Travel chipboardstickers on brown cardstock, fussycut around them with scissors to create a thin border, and adhere to the cover with liquid glue.
Decorate each section divider as desired. Here I’ve chosen a quote panel from the patterned cardstock in the collection, binoculars sticker, and ticket from the ephemera pack, and matted each with brown cardstock.
The other two section dividers were embellished in a similar way. To finish off the dividers, I inked the edges of each with brown ink.
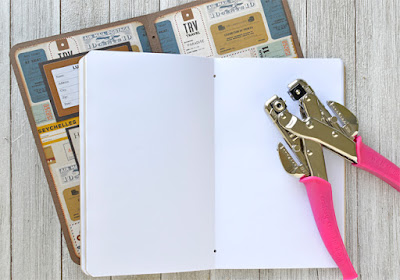
Using a hole puncher, punch small holes in the cover about 1” from the top and bottom. Pages and section dividers will need to be punched 0.75” from the top and bottom to accommodate for the extra width of the cover.
Arrange your journal as desired and thread natural twine through both holes of the pages, section dividers, and cover so that the ends meet on the outside of the book. Tie a sturdy knot and trim with scissors.
Enjoy your new handmade travel journal…add photos or memorabilia from your trip to the pages and record your thoughts or even use it as a sketchbook!
Don’t forget to fill out your luggage tag in case it gets lost…and you can use the ledger panel as a table of contents too.
I hope you enjoyed this fun handmade travel journal tutorial and thanks so much for stopping by today. Be sure to visit the FotoBella store and pick up this beautiful collection today!
~ Annie


No comments:
Post a Comment