


 |
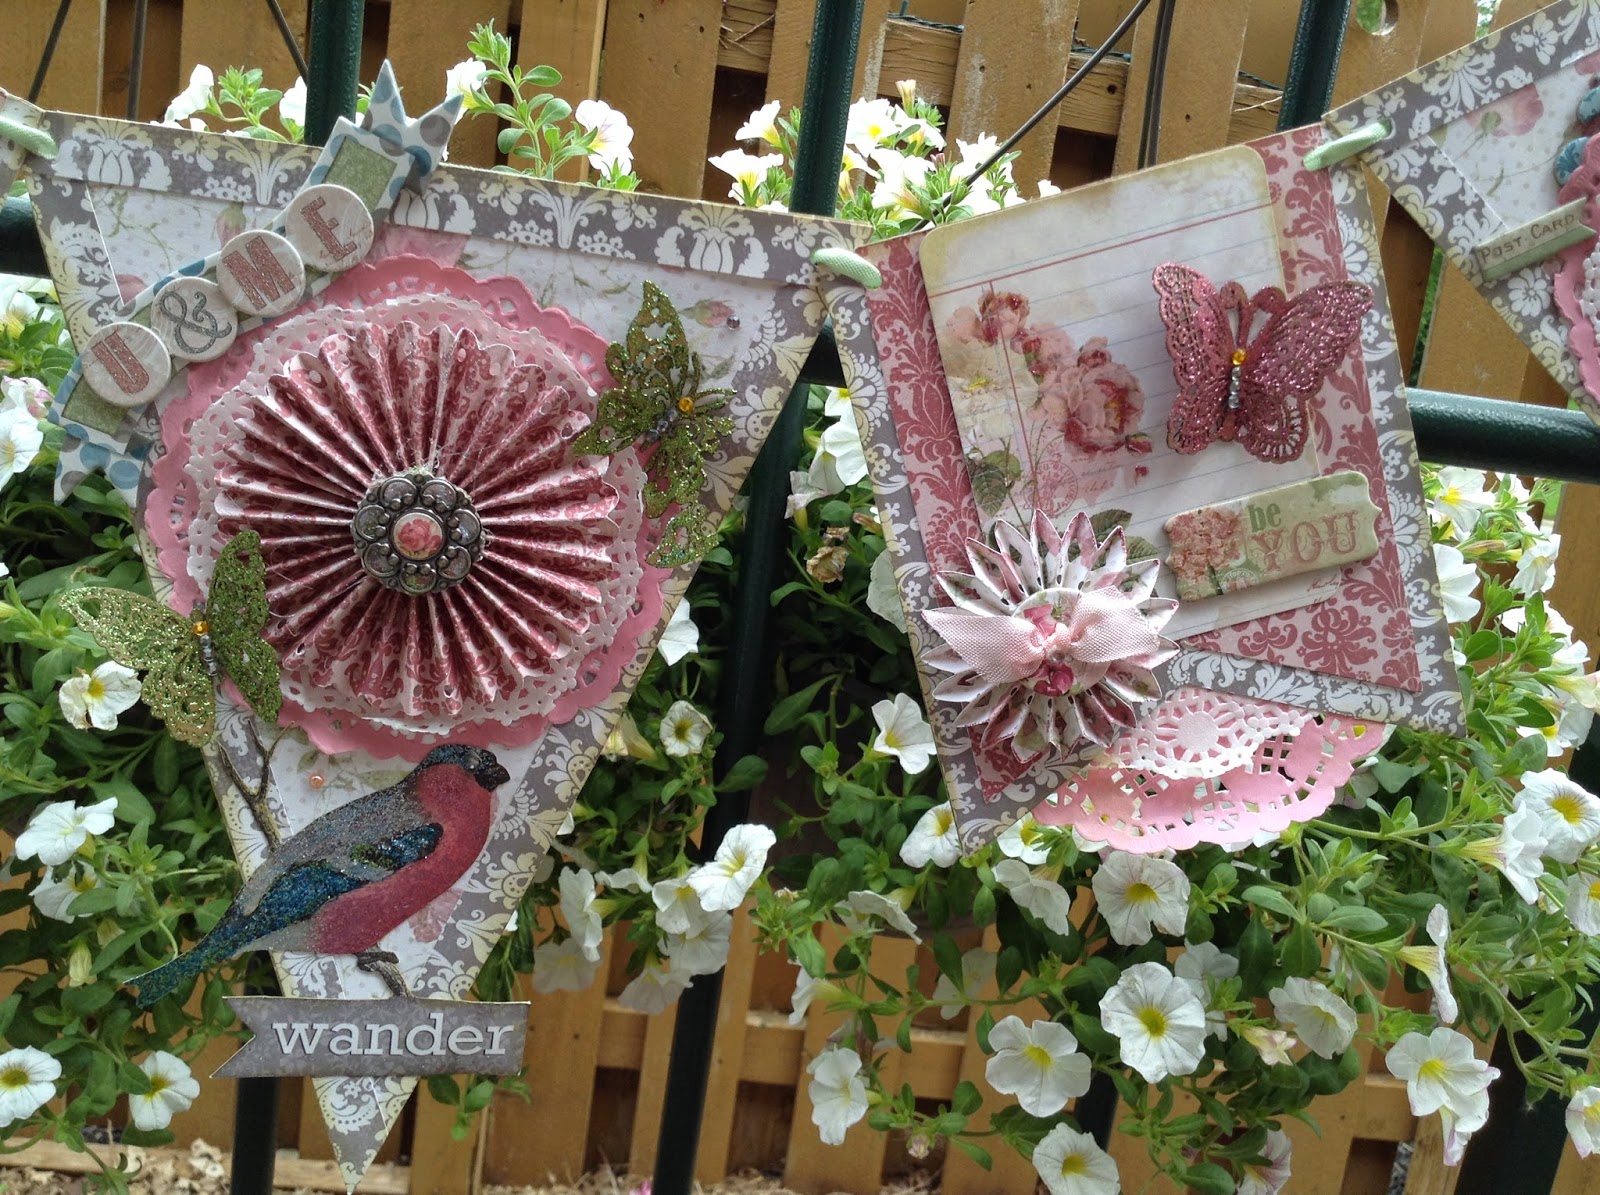
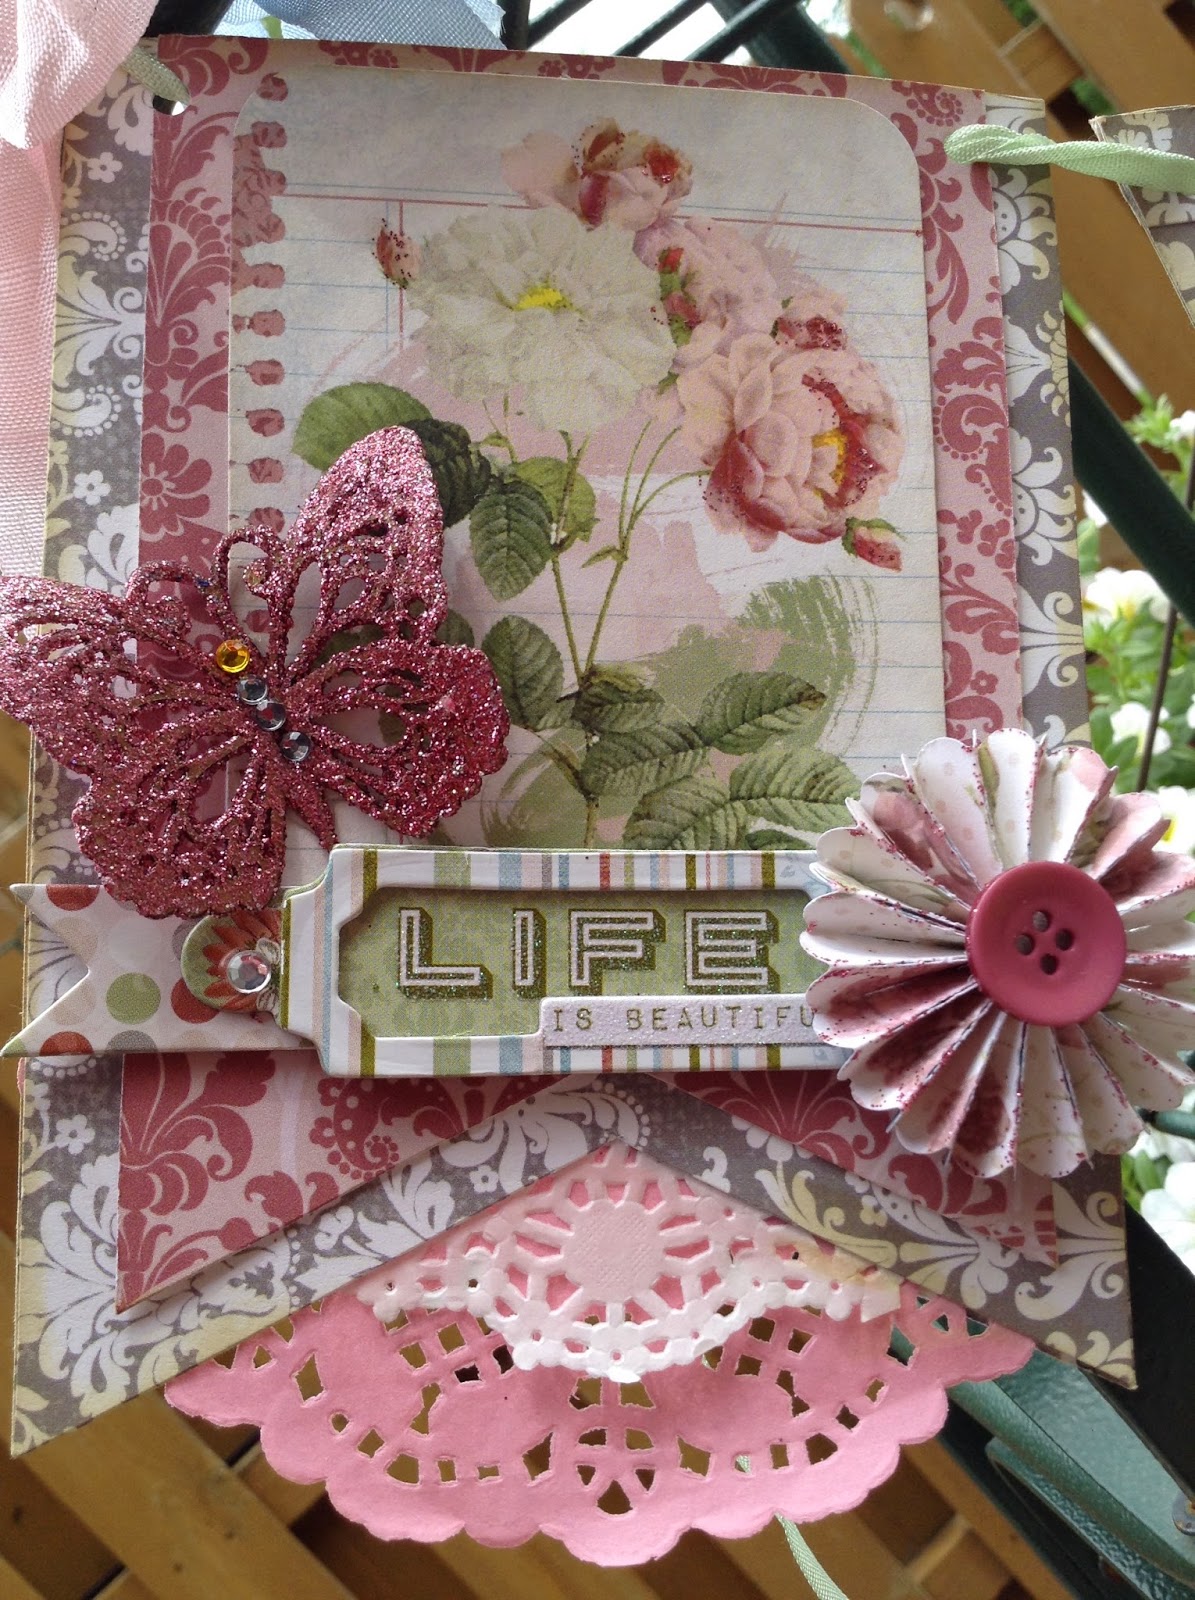
| A sneak-peek of my pretty Garden Journal Banner embellished with Florets |
Everyone loves to embellish their projects, and sometimes we use dies to make them...
This is ReNae from FotoBella's Design Team, and one of our favorites is the beautiful FLORET. Now, there are lots of dies in the market to make florets...they are available from various manufacturers, and come in several sizes. But did you know that you can easily make your own florets WITHOUT a die? And, you can make them in any size you wish!
In this short tutorial, I will show you how quick and easy it is to create your own florets by using your own scoring board and a bone folder!
Scoring board
Paper or thin card stock
Bone folder
Edge punch
Scor-Tape or paper glue (I like Scor-Tape as I find it easier to use and it's quicker)
Button or cardboard sticker (for center dot)
OR
Round punch (for center dot)
Hot Glue Gun or Large Glue Dot
The paper you use for your floret will greatly impact the appearance of the floret. If you select a repeated pattern, such as lined paper, it will give your floret more notice. It will appear to POP on the page. I like to use these for focal points. The direction of the stripes plays a part as well. (see photo in step 1) If you select a more muted color, it will blend into the project and act in more of a supporting role to your composition. In our tutorial I will show you both styles for comparison.
Step 1. CUT THE PAPER
Cut a piece of card stock measuring 12 inches by whatever width you want your floret to be, divided in half. (Remember it doubles in size, so for the example in our tutorial we will make a 1 1/2 inch floret. So in this case, our paper strip would measure 12 inches by 3/4 inches.)
NOTE: If you are making a floret that is larger than about 2 inches in diameter, you will need to cut an additional strip of paper. Due to the circumference the floret needs the extra paper to make the complete circle. One strip is enough however if you are making a fan. (see last photo)
 |
| Cutting the lined paper horizontally at 3/4" |
 |
| Cutting the lined paper vertically at 3/4" |
 |
| Because of the size of this floret, it would require 2 strips of paper to complete the circle. Just use Scor-Tape again to adhere the two strips together. |
Place your strip of paper on to your score board and score every 1/4 inch. Go across the entire strip.

Step 3. PUNCH A DESIGN INTO THE FLORET.
Using any edge punch, cut a repetitive design into one side of the strip of paper, as shown.
 |
| Any straight edge punch will work for this |
Fold your scored paper strip back and forth the entire length of the paper. Fold forward then backward, forward and backward until the entire strip is folded. Using your bone folder, burnish the fold lines so that they are crisp and sharp.
 |
| Here you can see the two different paper strips, one cut vertically and one horizontally. It will greatly change the look of the finished floret even though they are made the same way. |
Using Scor-Tape, adhere the two edges of the folded paper strip together. Place a strip of score-tape to one end of the folded floret, and adhere it to the other end. Burnish, making sure the continuity of the folds are uninterrupted. It should be one continuous circle.
 |
| Run the Scor-Tape along the edge and peel off backing. Adhere to other end. If you are making a large floret, now is when you adhere the two strips together, creating a circle like the one below. |
This is the trickiest part. You will want to press down in the center of the floret, and either add hot glue to the center, or place a glue dot to the center of the floret. If you are using hot glue, hold down the floret long enough for the glue to dry ( several seconds) A glue dot is a good alternative, as it is easier to handle and won't burn your fingers! However, it may come off if not adhered down properly.


Florets look unfinished unless they have a center dot. This can be a button, a punched out piece of paper, or any other round disc-shaped object. You can use another glue dot or hot glue. Either works great!
 |
| Vertically cut floret |
 |
| Horizontally cut floret |
Happy Creating!
ReNae
WOW Renae this is stunning! Thanks for sharing and the tutorial.
ReplyDeleteHugs
Linda xxx
http://lindasimpsoncraftypieceofheaven.blogspot.com
Thank you Linda!
DeleteGorgeous banner ReNae, and fabulous tutorial!!
ReplyDeleteThank you Drea! I'll be presenting the entire banner in my next post!
DeleteThis comment has been removed by the author.
ReplyDeleteCheck back soon to see the entire banner made with Bo Bunny Garden Journal " I want it all" Bundle by FotoBella!
DeleteWowza! Great tutorial ReNae!
ReplyDeleteThanks Apryl!
DeleteHow beautiful it looks. We recently made lots of rosettes for my daughters birthday!!
ReplyDeleteCheers
Dr Sonia
Cards Crafts Kids Projects
Thank you, Dr. Sonia! They are lots of fun to make and they look so cute!
DeleteHow beautiful it looks. We recently made lots of rosettes for my daughters birthday!!
ReplyDeleteCheers
Dr Sonia
Cards Crafts Kids Projects
What an absolutely gorgeous project!!!!! love the tut....thanks for sharing and making it look easy,lol. Hugs my friend!!!!❤️
ReplyDelete