Shop FotoBella

Shop for Scrapbooking Supplies by Product Type Shop for Scrapbooking Supplies by Brand Shop for Scrapbooking Supplies by Layout Theme Shop for Scrapbooking Supplies by Color

Search This Blog

Wednesday, December 30, 2015

Bo Bunny Love & Lace Layout

     Keep the romance alive with Bo Bunny's Love & Lace I Want It All Bundle from FotoBella! This collection has a great mix of feminine and masculine touches, even though I went more feminine with this photo that I scrapped of my late grandparents dancing the night away!


     I was inspired by this fabulous sketch from Stuck?!Sketches, as it's been awhile since I've worked with a sketch.


     To capture the movement in the photo, I decided to cut around the curves of the lace paper, and water distressed the edges of the other papers that come in the 12 X 12 Collection Pack. I also brought some movement by hand-stitching the black zigzags in between the torn pieces of the burgundy "Cherish" paper, instead of stitching straight across as shown in the sketch. The flowers that come in the Ephemera, were layered, misted, and inked around the edges with Worn Lipstick and Aged Mahogany Distress Inks. For the centers I used the chipboard Buttons, and the black metal flower and buttons that you can also find in the Ephemera, which is always PACKED with some great goodies! Then I stamped and embossed the other black flowers using the Floral Stamp, which is one of my faves!


     For the titlework, I used the "Always" glitter piece from the Layered Chipboard, and my papers for the rest. The black and white lace paper that's behind the photo and under the "Always" piece can be found in the Noteworthy pack. 


     Thanks for your visit, and be sure to visit the FotoBella store to pick up your own bundle! 


Monday, December 28, 2015

FotoBella Design Team Ornament Exchange

Happy Holidays!

All of us at FotoBella hope everyone is enjoying your Winter, and having an amazing Holiday season!

There are a lot of great exchanges that take place around the Holidays, and our creative genius ReNae coordinated our Design Team Ornament Exchange.

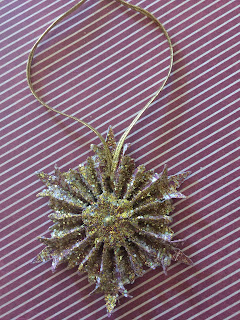
Each designer was to create an ornament, based around a Rosette, and a handmade card for a fellow team member.

What they have created is just incredible!

Drea's gift to Apryl
Apryl's gift to Cher
She used products from the Bo Bunny Dear Santa I Want It All Bundle


Jeri's gift to Jessica

Jessica's gift to ReNae
She used MME Cozy Christmas and Basic Grey Bside


ReNae's gift to Drea


We would love to hear about the exchanges you have participated in this holiday season, and we would love to see what you have created!

Have a Merry Christmas and Happy Holidays from all of us at FotoBella.


Thursday, December 24, 2015

Bo Bunny Calendar Girl - Wedding Gift Card Envelope

Happy Holidays Everyone!
Jeri here, with the FotoBella Design Team. Christmas is just around the corner, but with the Calendar Girl I Want It All Bundle by Bo Bunny, you can create for any month! This amazing bundle comes with adorable paper prints and embellishments for each month and Holiday. The colors are bright and I love the gold accents.

We are heading to a wedding this month, and this darling heart print paper was perfect for a gift card envelope.


I used the We R Memory Keepers Envelope Punch Board to make the perfect size envelope to fit the gift card.


The Foil Washi Tape and this darling Medallion accented the envelope beautifully.


 What fun projects have you created with this amazing bundle?

Monday, December 21, 2015

Bo Bunny Calendar Girl - Ultrasound Layout Tutorial

Ultrasound Layout


Check out How to Craft an Ultrasound Layout by FotoBella Papercrafting Supplies on Snapguide.


Supplies:
Bakers Twine
3D Sticky Dots
Double Sided Tape

Tools:
Paper Cutter
Scissors
 Hot Glue Gun

Grab the April Sheet and some Black/White Bakers Twine. About ¾ down the sheet, hot glue the bakers twine down and start making a heart beat design.


Make sure to put a small hot glue dot at each turn point of the twine. Create the pattern however you want, but make a straight line on the right side.


Find the Black heart cut out from the Noteworthy package. Add 3 – 3D Dots to the back.


Attach the heart onto the right side of the straight twine area, as pictured.  


Find this design from the Pocket Squares. With the Foil Dot Washi Tape, tape around the inside of the wood border.   


Secure your Ultrasound image to the square with some 3D Dots. Some images will be different size, so make sure to print out a size that will fit inside this Square.   


Tape a couple of random pieces of Foil Washi Tape under the bakers twine on the right side. Secure ‘This is Happening’ Noteworthy cut out on top of it, and the Love banner below. Add a few Foil Chevron Stickers.  


With double sided tape, secure the image to the upper left area, as pictured.   


Grab your Stickles and add some glitter! I added some dots on and around the heart,…


Made an arrow next to the Chevron sticker ,…


And added some dots around the image. Decorate the area with more Foil Chevron Stickers as you like. Fold the excess twine over the page and tape to the back.


Thursday, December 17, 2015

10-minute Glitter Cards using Bo Bunny Sleigh Ride Bundle

This time of year there never seems to be enough time to get everything done!  We are hurrying here and there running this errand and that, and those Christmas cards we were planning on making have yet to be made, let alone mailed out!  So what's the solution ?  Quick cards!
In my last post I showed you a pretty winter card I made in minutes.


ReNae here, from the FotoBella Design Team, and today I'll show you how to make a glitter card and you'll have it finished in less than half an hour!  But before we begin, let's gather the following supplies:

1 pre-folded card measuring 4" x 5.5"
Paper Trimmer
Scissors
Scoring board
Bone Folder
Bo Bunny "Sleigh Ride" Patterned paper
Glue Dots
Gold or Silver Ribbon
Glue pad
Gold or Silver Glitter
Tape runner

Step 1. Cut your patterned paper at 3 3/4 " x 5 1/4".
Note: Use whatever color you like, but keep in mind how the glitter will look against that color.  
If you are using dark paper, use light colored glitter, and if you choose light paper, use a glitter that will show against the white.
(In our 2 samples here,  we have chosen dark blue paper for one, and white paper with a darker tree image on the side for the other.)


Step 2. Select your stamps.
I used the Bo Bunny Sleigh Ride set that comes with the "I want it All" Bundle.

Step 3. Place the polymer stamps on acrylic blocks.
Instead of using ink, you use glue to stamp your patterned paper!

Step 4. Stamp the patterned paper as desired.  
Step 5.  Sprinkle glitter on to the stamped images.
Be careful to cover the entire stamped image.

 Step 6.  Adhere the patterned paper to card base.

Step 7. Ink the edges of card and add a ribbon if desired.
Darker glitter shows up on the light paper.
 Here I have selected a darker paper for my stamped image,
so I used a light colored gold glitter
And that's it!  You have made a card in less than 10 minutes!
Glitter cards are fast, easy and fun!
And you can have them in the mail in time for Christmas !