Welcome! Today I wanted to share a quick tutorial of how you can make your own flowers and gift tags.
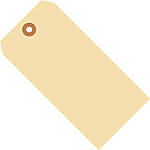
I started with just a plain shipping tag. I buy them in bulk because I go through them so fast. I then used the blue-greenish polka dot paper from the MME Chalk Studio 2 bundle and covered the tag with it. From there I pulled out the for you tag from the bundle as well and attached it.
Then I started making my flowers to adhere to the top. I started my flowers with 1.5x1.5 and 2x2 squares but for the purpose of showing you easier I did a 4x4 square. I started by freehanding a curly-q line to fill up the square. I then started cutting following the line the best I could. It wasn't always exactly on the line, don't stress over that.
This is what you get once you cut all the way around to the center.
From there you start to wrap the paper round the curly-q. You want to do it pretty tight in the middle. Then you put a drop of glue where you want the flower on your tag. You will have to hold it for minute so that it will hold nice and tight. Be generous with the glue you want it to stay nice and tight in the curly-q.
Once I was done, I added enamel dots to the centers to finish it off and some ribbon from my stash. I then used a Martha Stewart punch for the butterflies, just to add a little something else. I think it turned out pretty cute. What do you think?
Thanks for stopping by! Jessica


No comments:
Post a Comment