Shop FotoBella

Shop for Scrapbooking Supplies by Product Type Shop for Scrapbooking Supplies by Brand Shop for Scrapbooking Supplies by Layout Theme Shop for Scrapbooking Supplies by Color

Search This Blog

Monday, March 27, 2017

How is everyone doing today?
It's Jeri here with the FotoBella Design Team.

What kind of scrapbooker are you? Do you scrap your pages in life order, or do you wait to find the perfect paper to match all of your previous images before you scrap them?

I am the type to wait for the perfect collection of papers and accessories before I scrap my pages.I keep all of my images on an external hard drive and go through them constantly to see which images will fit perfectly with papers I am working with.

The colors are very streamlined with black, white, red and pink. It is very 'Valentine' themed, so of course it coordinated perfectly with these darling photos of my 2 nephews Valentine's Day this year.


Thanks to SnapChat, it allows my brother and sister-in-law to add captions to their photos, and easily describes what they were doing in every photo. And of course, adds darling filters to these cute little faces!


The sticker sheet makes is easy to add cute little embellishments throughout the pages.


Thanks for stopping by, I hope you are inspired to create today!


Friday, March 24, 2017

It's Game On with Bo Bunny

Hello FotoBella Friends!  It's Game On! today with Bo Bunny and FotoBella!  I've been playing with the new I Want It All Bundle with Bo Bunny's Game On! collection.  Anyone out there have kids playing team sports?  Game On! combines common team sports themes so that it can be used in a variety of ways.

My layout features one popular team sport, Soccer!  My youngest daughter started playing soccer when she was two.  A very informal team that basically gets the kids running the field and learning the basic concepts.  Man do I have some cute photos from that!


Mind you at 2 years old, this is not an organized game or team and they didn't have uniforms.  But they got to kick the ball and make goals all the same!  


I used one of the jerseys from the Noteworthy package to add journaling.


And added some fun journaling to the soccer print page!


Lucky for me, I had a stash of thickers that came in handy.  The Varsity black & white thickers were a perfect match to this collection.  If I'm being honest...I've had these thickers for quite a few years and not even sure if they are still for sale!? A trip to Michaels may not disappoint.  However, the same look could be replicated by shadowing white lettering either with a die cut machine or just creating a black background with cardstock and white thickers.  That's the beauty of crafting, getting creative to get the result you want! 

 Hope you enjoyed my project today and if you're in need of some team sport scrapbooking supplies, FotoBella.com is the place to shop and add Bo Bunny's Game On! collection to your shopping cart!


Have a fabulous day!


Here are the supplies I used: Bo Bunny Game On Paper:  Game On, Kick It, Lockers, Diamond, Blue Double Dot

White Cardstock, Black Cardstock

Embellishments: Bo Bunny Game On Noteworthy, Bo Bunny Game On Clear Stickers, Bo Bunny Game On Chipboard, Bo Bunny Game On Blue Hue Jewels, Varsity Black & White Thickers, Brown Ink


Wednesday, March 22, 2017

St. Patrick's Day Layout

Hello fellow crafters!

Jeri here with the FotoBella Design Team, and this month I get to play with the new BoBunny Life In Color I Want It All Bundle.


Just check out all the goodies that this massive Bundle comes with! You will not need any extra embellishments to create, this bundle comes with a large variety of products such as chipboard, stickers, die cuts, and even the most incredible foil vellum sheet!

Since we just celebrated St. Patrick's Day, I thought I would show some versatility to this bundle and create something other then the obvious.
Using this green dotted sheet, I added a few paint splatters with the Emerald Prima Color Bloom Spray. I then tore the green dot area off of the Nature sheet. I made a couple of shamrocks with the We R Memory Keepers Mini Alphabet Punch and some green cardstock, and inked the edges with Tim Holtz Pine Needle Distress Ink Pad. I layered my image on top of green frame from the Utopia Sheet and added some green buttons to finish off the layout.


Thanks for checking out my St. Patrick's Day Layout!
We would love to see what you create with the new BoBunny Life In Color I Want It All Bundle. Tag us in your photos!


Monday, March 20, 2017

Hello, Spring!

     Do you hear the birds chirping, or smell and see the beautiful flowers? Today is officially the first day of Spring, bringing warmer temperatures and new growth. Drea here with the FotoBella Design Team, and  I decided to play with my new Distress Crayons for the second time in my art journal, using Bo Bunny's Secret Garden Ephemera, Chipboard, and Noteworthy from FotoBella.com.


     I started by tearing some pieces from the book page that comes in Bo Bunny's Secret Garden Ephemera, and inking the edges with Black Soot Distress Ink using my Blending Tool. Then I used Prima Marketing's Garden Fable Stamp with Ranger's Jet Black Archival Ink to stamp over the book pieces and background. After giving it a few sprays of  Antique Linen Distress Spray Stain, I added the paper from the Ephemera after tearing the edges, and coated everything with Prima Marketing's Clear Gesso to prime it for the Distress Crayons.


     I used Picked Raspberry and Twisted Citron from Set #1,  Peeled Paint, Chipped Sapphire, and Seedless Preserves from Set #2, and Antique Linen and Black Soot from Set #3. The crayons blended really well on the middle paper, but not as much along the right, which might have been from not enough gesso. So I used a baby wipe over some areas, mainly to lighten up the Chipped Sapphire, and to use over Tim Holtz' Blossom Stencil. But then I learned, after watching a video from Tim himself, to use a paper towel moistened with water instead. Now I know for next time. Lol!


      This glittery bird was my inspiration for this page, and along with the Hello, Spring banner, comes from Bo Bunny's Secret Garden Noteworthy pack! I placed him near the music notes on the torn paper from the Ephemera, and went over the edges with Black Soot Distress Crayon, blending it with my fingers.


     Finally I added a strip of grass from Bo Bunny's Secret Garden Chipboard!


     Thanks for your visit, and see what's new at FotoBella.com


Friday, March 17, 2017

Luck O' the Irish!

Every year on March 17tth, green-clothed revelers across America will 
celebrate  Saint Patrick and all things Irish. 
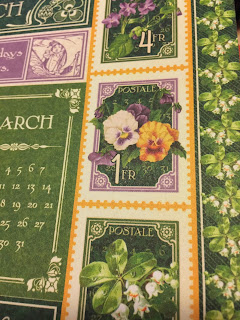
Hi! It's ReNae here, and in honor of this special day, I designed a card using the  "Children's Hour" calendar paper collection by Graphic 45.  
This beautiful paper is fun to use all kinds of projects! 
This collection is great for making cards and tags...you may remember our monthly kits from 2016 ( the 2 cards/2 tags featuring this collection
Kits are available on our website!


Using gemstones adds sparkle and interest!


Layering the images makes the card interesting


 We hope you like today's card! From all of us at FotoBella.com, 
we wish all of you a safe and HAPPY St. PATRICK'S DAY!

Wednesday, March 15, 2017

Hello Love Simple Stories Layout

Welcome to the blog today!  It's Apryl with FotoBella's design team with a layout to share with you.  I can't get enough of this cute Simple Stories Love and Adore collection.  I don't know about you?


It truly is a very simple collection to work with.  I love this background paper and it didn't take much to pull this layout together. I chose a 4"x6" photo and cropped it down to 3"x6" and double matted it with black and white cardstock.  I kept the white border thicker so that I could embellish it with the enamel dots.  The title "Hello Love" is from the Chipboard sticker pack along with the flowers and the hearts.


I also added fun embellishments below the photo. 


 I do plan to add some journaling in the white space area, but I like to do that later when putting the layouts into the book, to help create a storyline and good flow between layouts.  

Hope you found some inspiration today and find yourself busy crafting with Simple Stories Love and Adore collection from FotoBella.com

Have a fabulous day!


Monday, March 13, 2017

Carta Bella Flora no.1 Quilted Layout Tutorial

     Drea here with the FotoBella Design Team, sharing a quilted layout that even non stitchers can make using Carta Bella's Flora no. 1 12 X 12 Collection Kit from FotoBella.com! The feminine, floral papers and colors go so well with the bold stripes, and any of them would work here, so feel free to mix and match to your own photo. I used this one of my aunt and mom that measures 3 1/2".


                             Supplies:                                                Tools:

1. 2 Carta Bella Flora no. 1 Striped Papers                           1. Scissors and Glue
2. 5 Carta Bella Flora no. 1 Patterned Papers                        2. Sewing Machine 
3. Petaloo Antique Red Mixed Blossoms                              3. Blending Tool

**************************************************

1. Cut a 6" square from the pink striped paper, and glue to the middle of the black striped paper. 


2. Cut 12 squares from various papers at 2 1/2".


3. Use blending tool to apply Black Soot Distress Ink around edges of your squares to add dimension and shadow. Glue squares to the striped papers leaving about an inch border around your page.


4. Machine-stitch around each square, or you can draw or stamp them.


5. Cut floral scallop from stickers at 5", ink the edges with Black Soot Distress Ink, and attach to the top of the pink striped square.


6. Add a 3 1/2" square photo to the center of the pink striped background. Ink edges of black stripes with Worn Lipstick Distress Ink, using your blending tool.


7. Fussy-cut around the flower bouquet, add date, and pop up from the bottom left square.


8.  Ink edges of title tag sticker with Worn Lipstick Distress Ink, and attach to the top right square. Secure top with small, black brad which I had in my stash. Then add flowers to the corner below tag.


Thanks for looking, and stop by FotoBella.com for these supplies and more! 


Saturday, March 11, 2017

Kiss the Cook!

Hi everyone, ReNae here! Today's post features a project I designed using the Bo Bunny Kiss the Cook "I want it all Bundle" at FotoBella.com . This bundle was loaded with fun diecutslayered chipboardbuttons, colorful stickers, pretty blossoms and all kinds of ephemera, in addition to the amazing papers!  I had no trouble thinking up fun projects for this collection! 


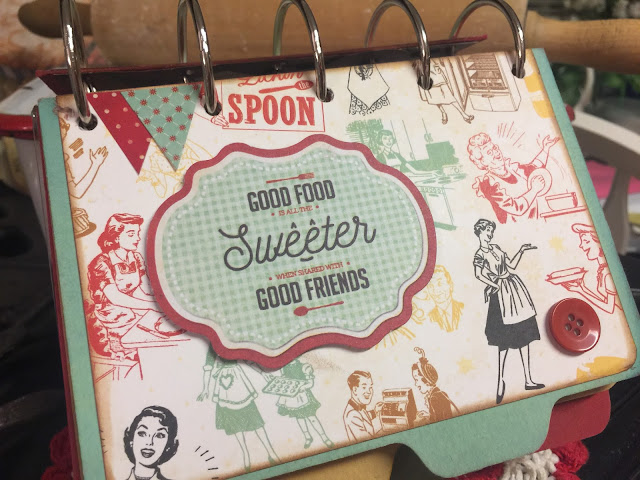
Today's project is a Recipe Album.  I used the paper collection to dress each of the twelve dividers, front and back, and used the other wonderful products in the bundle to embellish each divider. I punched five holes in each divider and attached them to an acrylic stand.  (Note: Recipe cards can later be added to the file in the appropriate section behind the dividers).


The first step was inking up the dividers.  Since I had twelve dividers I separated them into groups of four colors.  Using pigment ink, I colored the dividers just around the edges, as I knew I would be covering up the majority of the space with paper,  so no need to waste the ink.

The next step was to cover the dividers with the patterned paper.  I cut the paper so as to leave a 1/4 inch border all around the edges.  I used my corner rounder to soften the corners and adhered the paper to the divider.  Five holes were punched into each divider using my Big Bite. 
After the paper was adhered, I placed stickers on a couple of the pieces of ephemera, creating my own personal stickers. Then I embellished the dividers as shown below.  Since I used a flip-type album, I tried to embellish both sides of the divider when possible because both sides would be visible.  And sometimes, I let the paper speak for itself.  Here are the finished dividers.  Enjoy!

Made the sticker


Page 1
Pages 2 and 3


Pages 4 and 5


Pages 6 and 7


Pages 8 and 9


Pages 10 and 11


Pages 12 and 13


Pages 14 and 15


Pages 16 and 17


Pages 18 and 19
Pages 20 and 21


 Pages 22 and 23


Recipe albums are also good for memory keeping.  To preserve a fun cooking memory one could easily incorporate a photo and journaling spot instead of a recipe card.  And what a great project to do with your children or Grandma.  Be creative!  Have fun!  And always start with an "I want it all Bundle" from FotoBella.com!

This scrapbooking kit includes 2 sheets of 12 papers in the BoBunny Kiss the Cook collection (Kiss the Cook Paper, Kiss the Cook A La Mode Paper, Kiss the Cook Apple Pie Paper, Kiss the Cook Baked Fresh Paper, Kiss the Cook Cinnamon Paper, Kiss the Cook Delicious Paper, Kiss the Cook Family Recipe Paper, Kiss the Cook Farm Fresh Paper, Kiss the Cook Menu Paper, Kiss the Cook Pantry Paper, Kiss the Cook Quilt Paper, Kiss the Cook Yummy Paper), plus all of the embellishments: 1 sheet Kiss the Cook Foil Vellum Paper, Kiss the Cook Combo Sticker, Kiss the Cook Noteworthy, Kiss the Cook Layered Chipboard, Kiss the Cook Ephemera, as well as coordinating Bo Bunny Essentials: Wildberry Zinnia, Double Dot Mocha Jewels, Double Dot Citrus Brads and the exclusive FotoBella Paper Organizer.