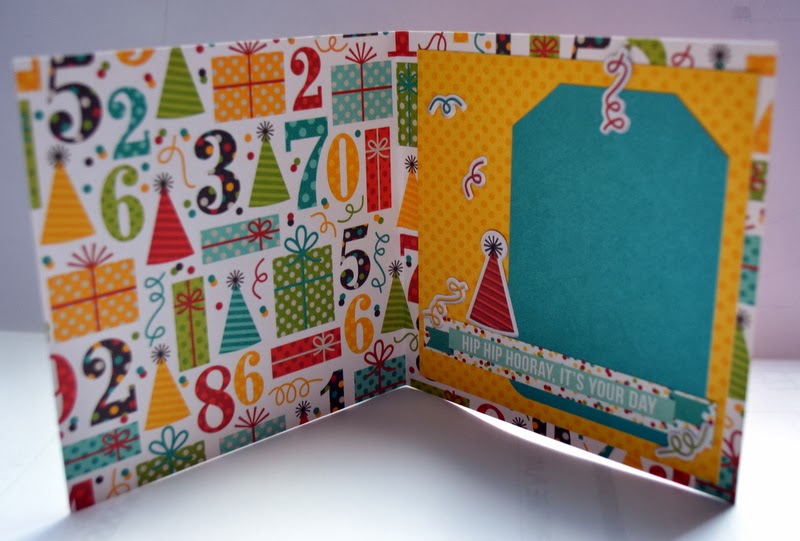
Happy day to you! Today I wanted to share a tutorial of how to create this fun file folder mini album. My daughter's fifth birthday is next month and I thought I would make a mini album to house all the pictures from the day. I used the We R Memory Keepers Hip Hip Hooray I want it all bundle.
If you have never created one of these mini albums, don't worry they are super easy and fun. You just need a file folder to start. You can even recycle a used one if you want. I used a manila folder I had laying around but you could use any color you wanted.
The first thing I did was to fold the folder into an accordion style.
To do this, open your file folder up completely and lay it flat. Start by folding the bottom up about 4 inches. If it is a little bigger that is fine. Fold the file folder backwards and then top flap forward to match your folder and do the same with the back. I then inked all the edges with brown ink. You could use anything you wanted.
After
I was done inking, I started cutting my papers to fit. First I did the front pockets. I cute four different papers to be 4x4 and
glued them down. I then cut the papers
to cover up the top. I decided to do 4
different patterns here. These papers are cut to 4x6 size and glued down. For the tab of the, I cut a 0.75”x4 piece and
a 0.75”x6” piece.
For the front cover, I used three different
pieces of patterned paper. I cut the
yellow piece to be 4x5 and the turquoise piece to be about 2x4. Then I layered the stripped patterned paper
on top. I cut around the tag so it was
only the green oval, then used pop dots underneath it to give the whole thing
some dimension.
The next thing I did was to embellish the bottom
of the 4 inch fold. I used some stickers from the sticker sheet, cut some of the
words from the patterned papers and used one of the tags.
For the tags, I used white cardstock as my base.
For the larger tags, I cut 4 tags to be 3.75x6.5. I rounded the corners with my corner
rounder. For the smaller tags, I cut
them to be 2.75x5.5. For the smaller
tags, I rounded the bottom corners but cut the corners at an angle to create a
shipping tag look.
I started with the large tags, I left one side
white because I’m thinking I will put a larger photo on the back side of
that. On the other side, I covered two of the tags with green cardstock and two with turquoise cardstock. From there, I started embellishing them a
little. I kept it simple since I haven’t
added my photos yet. My plan is to put a
3x4 photo on this side of the tag.
For the small tags, I kept it pretty simple as
well. For three of them I left one side
white with the intent of covering it with a full photo. On the back side, I
covered each tag with a patterned paper and added a few of the words cut from
another patterned paper to the bottom. I
then used some ribbon from my stash to the top of the tag.
For the fourth tag, I covered it with patterned
paper and then added a journaling tag to it. Although, I'm probably going to need more room than that. :)
I created one more tag for my album. I used the celebrate tag and popped it out
from the tag. I then cut a piece of 3.75x5
patterned paper to attach it to. I will
also be able to add another 3x4 picture to the back side of this tag.
The
last thing I did was add patterned paper to the back of the file folder to
finish it off a little. I cut these pieces to be 4x7 long. If you wanted to you could add more to these
or extra photos.
Thank you for stopping by today! Hope you enjoyed this little album. Don't forget you can check out all the papers included in the bundle here.
Have a great day! Jessica


