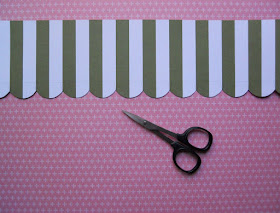
Drea here with the FotoBella Design Team, featuring this adorable striped awning made with the Carta Bella Flora no.1 12 X 12 Collection Kit from FotoBella!

Supplies: Tools:
* Carta Bella Flora no, 1 12 X 12 Collection Kit * Scissors
* "Peeled Paint" Distress Ink * Pencil and Eraser
* Blending Tool
1. Use pencil to lightly draw a line 2 1/2" from the top of the striped "Rose Garden Bouquet" paper. Draw half circles a half inch below line using a 1 1/4" circle stencil along every white and green stripe.
2. Cut scallops out with scissors.
3. Fold and crease at the pencil line, erasing your lines afterwards.
4. Use Blending Tool to apply "Peeled Paint" Distress Ink around the edges.
5. Cut 1/2" from sides of the back of the "Rose Garden Bouquet" paper, and punch along the bottom. Cut rectangle from middle of the "Petunia Patch Bundle" paper, and fussy-cut some flowers from the back. Glue punched paper about 2" down onto the rest of the "Petunia Patch Bundle" paper.
6. Attach two 4" X 6" photos and journaling card onto your page.
7. Use alpha stickers to spell your title onto the awning. Run a line of tape runner onto the top back of awning, and pop dots along the bottom of the creased line. Then scatter curled and fussy-cut flowers onto the awning and rest of your page.
8. Finally, fill out journaling card with black pen, and use stickers for the date.

Thanks for looking, and shop FotoBella to get these supplies and more!


The awning on this layout is so perfect, I love the creativity!!
ReplyDeleteThanks Jeri! :)
ReplyDelete