Friday, February 26, 2016

Hello Friend! (A Card Tutorial)


Check out How to Create a Hello Friend Card by FotoBella Papercrafting Supplies on Snapguide.

Hi Friends!  ReNae here with the FotoBella Design Team, and do I have a fun project for you today!! We are going to make a cute and super easy card using only a paper trimmer, a circle punch, a scallop punch, and the fun & funky embellishments you receive when you buy the Typeset "I Want It All" Bundle from Basic Grey and FotoBella!
I love this paper collection.  The colors are soft and right on trend, in fact, most of these colors are on the Pantone  2016 Colors of the Year.  The embellies are so fun and so in right now!  This collection will be perfect for all ages and it's good for boys AND us girls!

Note: As some of you may have already learned, Basic Grey is halting production in their paper craft division and focusing solely on the quilting and textile division.  
So get it while you still can!
We are going to make a card measuring 5 1/2 x 5 1/2 . 
YOU WILL NEED:
1 sheet 8 1/2 x 11 off-white card stock 
One 1 1/2 inch Circle Punch 
Scallop Punch or die
Paper Trimmer
Grey Ink for distressing
Baker's Twine (grey/white)
Distress Tool or sponge
Scor-Tape or tape runner adhesive
Items from the Typeset "I want it All" Bundle, including 6x6 Paper Pad, Flair stickers and Epoxy Sticker
OPTIONAL: Hello die

1. Start with a piece of off-white card stock measuring 8 1/2 x 11" and cut it down to 5 1/2 x 11", then score it at 5 1/2 inches to create the card BASE.


2. Cut 2 strips of the grey paper with the white dots, and cut them at 2" x 5 1/2.  Distress Edges.


3. Adhere to card at the top and bottom of the card, leaving an 1/8 inch of the card base showing.  (Make sure you position your card in easel style, which means the opening is at the bottom.)

Select these papers for the next few steps.
4. Cut a strip measuring 5 1/2 x 2 inches from the orange polka dot paper.  Distress Edges and set aside. 

5. Cut a strip measuring 1 1/4 x 5 1/2 from the blue "hello" paper. Distress Edges. Adhere to the top edge of the orange paper. Adhere it so that one inch extends from the orange paper.

6. Cut a strip of plain blue paper measuring 1 " x 5 1/2.  Punch scallops using an edge punch. Adhere to bottom of orange strip so that the scallops extend from the edge. 

7. Adhere entire  piece to card base, in the center of the card and so that the grey paper is covered at the edges as shown. Adhere only on top and bottom, not on sides (this allow you to run baker's twine through the papers in a later step.)
                        
8. Punch 3 circles using the circle punch, and adhere them side by side on the orange strip of paper.  


9.  Remove two flairs stickers from the Flairs pack in your bundle and place as shown.
                        

10. Remove the letters FRIEND from the epoxy alpha sticker sheet and adhere to the card on the right side of the scallops. 


11. Cut an 18 " length of baker's twine in Grey/white or Black/white and run through the two layers of paper on card front.

Push twine towards top of card and tie a bow on the righthand side.

And that's it!  
Finished card without the "hello" die cut
12. Optional: Cut a die cut "Hello" from the orange polka dot paper and adhere to top left side of card.
I used this little die from my stash.
This is the finished card with the "hello" die cut. 
For fun I stamped the envelope with a hello stamp I had in my stash.

This card is so easy to make and would be cute 
for almost any occasion so please give it a try!  
Post your finished card in the comments section below!  
A winner will be chosen at random from the participants! 
(Winner will be announced on 2/14/16 here on the blog)


Good Luck and Have Fun!
ReNae

Wednesday, February 24, 2016

Bo Bunny Altitude Layout And Sketch

     Depending on where you live, some of you are probably already sick of the snow, but here in the Sierra's, it really has been wonderful to finally see snow again following a four year drought! I used the beautiful Bo Bunny's Altitude I Want It All Bundle to create this fun snowy page.


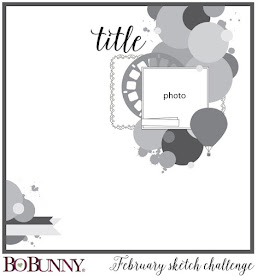
     I'm always inspired by Bo Bunny, and used this fabulous sketch for my design! Be sure to stop by their blog to see all of their latest collections, and visit FotoBella to pick them all up.


     I started by embossing the snow and snowflakes with some glitter embossing powder onto the background. Then I applied some gesso and Glitter Paste (Sugar) with the Ranger Dot Fade Stencil and TCW Texurized Stencil along the top and bottom. To color the drips over the dots, I used some LSG sprays and magicals. Then I made some major rips to the paper, and covered the edges with some Snow-Tex. I also used Snow-Tex on the ends of the fussy-cut snowflakes, covering the centers with Glitter Paste, which I also used on all of the buttons, adding even more from the Ephemera. To finish off the already sparkly snowflakes, I added some bling from my own stash to the centers. 


     To make the title, I applied some Broken China Distress Ink onto the top of the SNOW banner, that you can get in the Layered Chipboard, using my Blending Tool. Then I used some more Glitter Paste (Sugar) over the letters, and hand-stitched along the top. I created the other banner with some different colors of vellum outlined with a white pen, and machine stitched along the top, which is a great way to attach vellum. To the alpha stickers that come in the 12 X 12 Collection Pack, I applied a Wink Of Stella (Clear), and added WONDERFUL to the banner pieces, which I just traced from the banner that comes in the Noteworthy pack.


     I also used the frames from the Noteworthy pack behind and around my photo, adding the beautiful white Prima flower to the corner. 


     To create the tag, I used the gray paper that comes in the Ephemera, covering the edges with Snow-Tex, and adding some more snowflakes, tied off with some white fibers. 


Thanks for taking a peek, and have a wonderful day! 


Wednesday, February 17, 2016

Friendship Cards

Hi Bloggers!
If you enjoy making cards as much as I do, 
You will love the "Typeset"I Want it All" BUNDLE by Basic Grey.  
ReNae here, with the FotoBella Design Team.

There are so many  things to love about this paper collection!  
It's a bit retro and a bit kitschy, paper that will appeal to all ages from kids to adults.  The unique color combinations and patterns make it unlike any I've used before!


It has a cool funky vibe that would be perfect for hipsters, 
yet with the right design you can make it look vintage and retro!
So I sat down and played a while and here are a couple cards I designed with TYPESET.  Enjoy!


The "Hello" card was made using a telephone sticker, (included in the Bundle)
epoxy alpha stickers and a wooden embellishment
The "You're my Type of Friend" card 
was made using banner stickers,
the epoxy alpha stickers, and the metal flairs.

I used the epoxy alpha stickers to spell out HUGS FOR YOU!
The typewriter paper is blank so you can put 
whatever sentiment you wish.
I stamped "You're my type of friend"and added a metal flair!


There are so many cute ways you can use this paper! 
It's called "Typeset" and it's available at FotoBella.com!
Happy Creating
ReNae 


Sunday, February 14, 2016

Happy Valentine's Day!

As paper crafters, Valentine's Day is one of our favorites for card making. 
  
And to celebrate Valentine's Day 
I am sharing a card I made using the 
"Mon Amour" paper collection by Graphic 45. 
Valentine's Day first became associated with romantic love,  in the 14th century.  Lovers found comfort and took pleasure in pouring their hearts out on paper,
 in the form of love letters and Valentines, 
leaving behind a rich  and lasting testament of their love. 
By the 18th-century Valentine's Day had evolved into an occasion in which lovers expressed their love for each other by presenting flowers, offering confectionery 
and sending greeting cards known as "Valentines".  
A tradition we carry on today!
Elbert Hubbard said 
"The love we give away is the only love we keep." 
We paper crafters understand this, 
which is why we love to give our handmade Valentines away 
to friends and those we love! 

"Love conquers all things; Let us too, surrender to Love!" ~Virgil

Wishing you a Happy Valentine's Day from all of us at FotoBella.

-ReNae

Saturday, February 13, 2016

Bo Bunny Love & Lace Mixed Media Heart Tutorial

     Show them your love with this vibrant heart, made from mixed media and Bo Bunny's Love & Lace I Want It All Bundle ! And I'll SHOW YOU how to make it, on this romantic and elegant card that could be given for not only Valentine's Day, but an Anniversary, Birthday, or just to say I miss you!


***************************************************


 Supplies:
Ephemera or cardstock and dictionary page 
Gesso
Glue
Lindy's Stamp Gang Sprays (Rudolph's Nose Red, Cotton Candy Pink, Clam Bake Beige)
Lindy's Stamp Gang Magical (Rizzo's Rowdy Red)
Old Toothbrush


Directions:


1. Cut or trace heart from cream striped cardstock that comes in the Ephemera. I used my Cricut Expression and the Plantin SchoolBook cartridge at 3 1/2". Then tear vertical strips from the dictionary paper that's also included in the Ephemera, and glue to the heart, cutting around the excess edges. 


2. Cover the entire heart with gesso, making vertical strokes when applying. It's kinda hard to see the texture here, but make sure to let it dry completely before applying your sprays. 


3. Spray your heart, and while it's still wet, use a toothbrush dipped lightly in the jar of LSG Magical, and flick it randomly, which creates almost a sandy texture. You can see where I used it here in the center and along the right.


4. Place heart without adhering it, where you want on your card, and stamp rose cluster, using the Bo Bunny Floral Stamp and Ranger's Archival Black Ink, onto the heart and background at the same time. 


5.  Take your heart off and apply some Glitter Paste (Sugar) with the Tim Holtz Stripes Stencil. Once dry, use the Tim Holtz Paper Distresser around all of the edges. 


6.  Now sew around the edges, after tucking in the pink flower that comes in the Noteworthy pack. The button, black alpha stickers that spell "my", and the black flower are more goodies found in the Ephemera pack. I carefully removed the top layer of "Love" from the Layered Chipboard, eliminating the back, floral layer, for a cleaner, masculine look, since this is now my husband's second Valentine's card. But he deserves both! 


    Thanks for looking, and stop by FotoBella to see what's new! 


Thursday, February 11, 2016

Graphic 45 Children's Hour February Card Class/Valentines


Happy New Year and Happy February!  I'm ReNae from the FotoBella Design Team and I wanted to share with you a class I am teaching this year...
The Graphic 45 Children's Hour Card & Tag Class.

If you haven't signed up for this year-long Card & Tag Class, it's not too late!  
You still can!  
We are making four Valentine's Day projects that are perfect 
for that special person in your life!
Here is a peek at the beautiful cards and tags I designed for the month of February...

With your paid membership you will receive everything you will need 
to create all four of these cards and tags!  
In fact, you will receive a packet EACH MONTH, in addition to your starter packet!

You will learn new designs and techniques each month, 
and at the end of the year you will have made 48 cards and tags!

For information about this membership, or to sign up,  Click Here!
 Happy Card-Making!
ReNae


Monday, February 8, 2016

Bo Bunny Calendar Girl - Valentine Card

Can you believe it's February already?
I can't either, but I love Valentine's Day so much, I am ready for it!
Jeri here, with the FotoBella Design Team.

Here is another Valentine Card I made with the incredibly fun Calendar Girl I Want It All Bundle by Bo Bunny. This bundle is so amazing, almost everything on my card came simply from the Ephemera Pack!


Are you ready for Valentine's Day?
We would love to see your Love themed crafts. Post your pictures on the FotoBella Facebook Page!


Friday, February 5, 2016

National Wear Red Day

Today is #NationalWearRedDay


Red is a very emotionally intense color. It enhances metabolism, it's associated with energy, strength, determination as well as passion, desire, and love.

Not only wear your favorite red shirt today, but also surround yourself with some incredible red goodies!

Here are some of our favorites, all found at FotoBella: