Wednesday, August 30, 2017

You are Amazing Bo Bunny "Serendipity" Layout

     Hello! Drea here with the Design Team, and I scrapped this precious photo of my niece with Bo Bunny's Serendipity Collection from FotoBella.com.


     I started with the photo by tearing the edges along the top and sides, and coloring them with Tattered Rose Distress Ink using my Blending Tool. Then I fussy-cut her dress and feet along the bottom so I could place her on the nest that comes in the Noteworthy pack. 


        Right behind the photo is one of the larger pieces of paper that comes in the Ephemera, and from one of the smaller pieces, I used my Cricut Expression to cut the letters to spell her name. Then I used my blending tool again to color the bottoms of the letters with Frayed Burlap Distress Ink, and gave them a coat of Cotton Candy Stickles. The tag that it's on is from the Serendipity Bonus 12 X 12 Paper Bundle.


     Then I used the banner from the Layered Chipboard as my title.


     Most of the embellishments on here come from the Noteworthy, including the flowers, butterflies, and arrows. For some dimension, I decided to curl the flowers up.


     I also curled the butterfly wings and gave them some antennae with Bo Bunny's Butterfly Stamp.


     Along the left side, and over a couple of layers of distressed papers, I used Prima Marketing's Doily Stencil with White Gesso and some glitter. And of course, I finished off the distressed edges with some machine stitching.


     Thanks for taking a peek! Pick up your collection today at FotoBella.com!


Friday, August 25, 2017

Baby Colt Layout

Hello again! Jeri here with the FotoBella Design Team

Have you tried to add some very important objects to a layout page, but don't want to glue them, poke holes in them or damage them in any way? That was my situation with this layout.
Follow me through my step by step to see what I came up with!

This is my precious nephew Colt. He is no longer this tiny, we actually celebrated his 1st birthday three months ago!
His mom gave me some souvenirs from their hospital stay to scrapbook.


I loved this tree page from the 49 and Market Cottage Life Collection Bundle. Symbolized their growing family tree.

So I gathered these 2 sheets and 2 images I wanted on the page.


Layered the images on top of the dark blue sheet.


For visual purposes, I laid everything out on the page to see how it will fit.


Then I grabbed my Prima Marketing Color Blooms in Precious Stone and Boysenberry, and my Tim Holtz Sunflower Pearl Mist. Gave the page a few spritz.


I also used the Tim Holtz Distress Ink in Chipped Sapphire to ink the edges of this tag from the collection.


Grab some stamps and ink, and stamp the tag with info you'd like to remember.


I needed to secure this wrist cuff to the page somehow. So I grabbed a paperclip and some Loctite. I glued the paperclip to the page, and it held the cuff perfectly!


Of course it was easier to use the paperclip on the edge of the page for the other end of the cuff.


Using some 3D dots, I layered this tag on top of the image and the tubes from the cuff.


These ID bracelets were laminated, so I did use double sided tape on the to secure to the page. They are easily removable if needed.


The collection comes with both 3D stickers and paper flowers. So I added them around the page.


Here is the finished Layout, full of memories of this incredible soul who I just adore!


Make sure to check out the full line of 49 and Market at FotoBella.com, you will fall in love!


Wednesday, August 16, 2017

Ahoy Maties Layout

     Ahoy! Drea here with the FotoBella Design Team, and I have a fun layout made from white cardstock using this great sketch.


     I started by masking off the strip on the left with some tape, and applying Postbox Red Dylusions Paint to the Tim Holtz Zigzag Stencil. Then I masked the other side and used my Mini Ink Blending Tool to feather out London Blue Dylusions Paint. It kinda reminds me of a lighthouse.


     Next came a few spritzes of Broken China Distress Spray Stain along the top left and bottom right. Then I added splashes with the Tim Holtz Splatters Stencil and some more London Blue Dylusions Paint.


     The netting was stamped with Prima Marketing's Finnabair Net & Wire Stamp using Ranger's Archival Jet Black Ink. Then I used some papers from Bo Bunny's Pop Quiz Ephemera to create the banners, adding a couple of  Pop Quiz Stickers to them.


     For the title work, I used Bo Bunny's Pop Quiz Chipboard with some more London Blue Dylusions Paint applied to the upper letters.


     Then I finished it off with some buttons and hand-stitched circles.


     Thanks for looking, and see what's new at FotoBella.com!


Friday, August 4, 2017

Golf Cart Gift with Silhouette

How is everyone doing today?
I have a fun Silhouette CAMEO project for you today!

Jeri here with the FotoBella Design Team, and YES, I am still loving my new CAMEO. I find myself wanting to stay home from work just so I can create more projects with it!

If you buy a Silhouette from FotoBella, you will get a 1 month free of downloads from the Silhouette Store. I clearly took advantage of that and have been creating birthday cards and gifts for everyone!
Check out this awesome Golf Cart. It comes with a hole cut out in the center so you can put a golf ball in there.


I found this awesome shop on Etsy that prints on golf balls, so I had this one custom made. Front says 'Happy Birthday Kelly', and the back says 'If you find this ball, hit it better than Kelly did!'


It was so easy to center the top of the golf cart on the mat in the Silhouette Design program so I could get the paper print just perfect!


To fully customize this golf cart, I added 'hill-mobile' vinyl transfer to the front. Easily designed, cut and applied using FotoBella brand Vinyl.

**UPDATE**

Ok, truth... I let the golf cart sit, with the golf ball in it, while I decorated the gift box it would sit on top of. The wheels collapsed!!!
I did not use a thick enough product for the wheels. Knowing the recipient of this gift, he will probably keep the ball sitting in the cart, so I needed to make the wheels stronger!!


I cut larger circles out of cardboard and spray painted them black. My husband wanted to 'bling' up the wheels, so we easily designed these rims in the Silhouette Studio, sized them and printed them on metallic silver paper.


I grabbed a standard white gift box, spray painted it green, created a sand pit and glued on some grass.


Inside the gift box is a tee shirt that said "Talk Birdie To Me".


Here is the finished gift!
Totally thoughtful and heartfelt, with a side of giggles!


I hope you are inspired today!
Head over to FotoBella.com to see all the crafting products for anything you can dream up!


Wednesday, August 2, 2017

National Coloring Book Day

Happy National Coloring Book Day 


I am so happy that we get to celebrate one of the most calming, relaxing and fun activities all of us have enjoyed since we were kids!

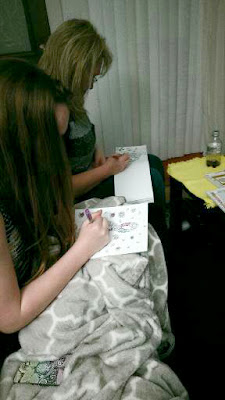
As I was thinking about how I wanted to form this blog post, I thought it would be fun to reflect back on all the great moments I have had with my family the last couple years, where we just relaxed and colored. 


I was so excited to find this large cardboard house you can color, for my nephew. That was a fun day!


It's amazing how 'coloring' has evolved. It is not just a flimsy book with thick lines to color inside of with crayons.
We now have incredible hard back books with premium paper, posters and even canvas dedicated to the art of coloring. We have an extremely broad range of markers, pens and pencils to create the most magical evening of coloring.

At FotoBella, you can find pages and pages of coloring book options from many popular brands. Here are just a few:


Chameleon Nature Color Cards


Prima Marketing Julie Nutting Coloring Book


KaiserCraft Kaisercolour Perfect Bound Coloring Book 9.75"x9.75"- Flora & Fauna


Prima Marketing Sandi Pirrelli Coloring Book - Flights of Fancy


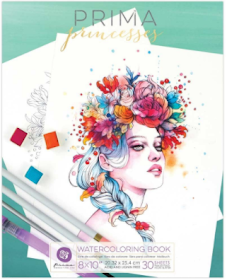
Prima Marketing Prima Princesses Coloring Book

Also check out the wide variety of coloring utensils at FotoBella.com

I hope you are inspired to do a little coloring today!