Monday, January 25, 2016

Bo Bunny Calendar Girl - Love Card

Has anyone started some darling Valentine's Day crafts yet?
Do you give handmade Valentine Cards?
Jeri here, with the FotoBella design team, and I love Valentine crafts. I love the colors, the shapes, the sentiments.

I am loving working with the Calendar Girl I Want It All Bundle by Bo Bunny. It is such a great bundle because it has fun prints and embellishments for each month throughout the year.

Look at the cute prints for Love Day!


I layered this card with paper sheets, die cuts, washi tape, this cute gold metal clip, and then added some Ranger Stickles for sparkle!


Post your Valentine projects on the FotoBella Facebook page! We would love to see what you are crating, and we might even share your projects!


Saturday, January 23, 2016

National Handwriting Day

Today we celebrate the incredible art of Handwriting.

Some people like writing, some people despise it, and some people are just so absolutely amazing at controlling that pen that their handwriting is coveted and even bought.

If you are looking to perfect your own handwriting, there are some incredible teachers that offer classes. Check your local area.

Head over to FotoBella, where you can get those hands on some exciting tools to help you write beautifully.


What did you create today?


Wednesday, January 20, 2016

Basic Grey Sun Kissed Paper weave card tutorial

Ok, so who is familiar with paper weaving?  The last time you may have done it is in first grade maybe?  Making a fancy place mat with construction paper?  Apryl with the FotoBella design team sharing a tutorial on how to make a card, weaving paper.  The collection featured is Basic Grey Sun Kissed from Fotobella.com.  Follow along to see how to get started in your own paper weaving adventure, I bet you'll like what you see.   

Check out How to Construct a Paper Weave Card by FotoBella Papercrafting Supplies on Snapguide.


Paper:  Cadence, Wildflower, Droplet, Wingspan; Title Sticker Sheet, Die Cuts, Black & White Card Stock
Tools: 
·       Dark Brown Ink
·       Scissors
·       Ruler
·       Stickles
·       Adhesive
·       Scallop Circle Punch 3”
·       Circle punch 2 ¼” 


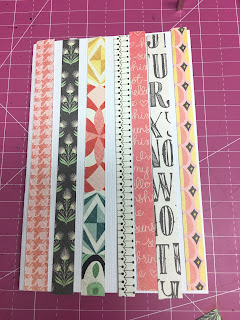
1.  Cut strips of paper approximately 1/4" to 1/2” wide by 12” long.  **The width of the strips may vary based on the type of paper cutter you have and how accurate you are with your cutting.  Try cutting a few strips with scrap paper to practice until you get the desired look you want.  The width of the strips will determine how tightly you need to weave the paper strips and the total number of paper strips you will need.   


2.  Cut the 12” strips in half so that they measure 6”.    


3.  For the base of the card, cut a piece of white cardstock so it measures 8” wide and 6” long. 


4.  Fold the card stock in half so that the face of the card measures 4” wide and 6” long. 


5.  Line up the strips of paper vertically along the face of the card in the pattern and color sequence that you like.  


6.  Holding the bottom of the strips with one hand begin weaving the first strip along the top, horizontally.  The weaving is done by going under one strip and then over the next, repeating the pattern across the strips of paper, until the end.


7.  The second strip should be woven in the opposite pattern than the first strip (ie:  over, under, over under..)  Once the first couple horizontal strips are woven in, place a ruler to hold the top while weaving in the rest of the paper strips.       


8.  Continue weaving the paper all the way to the bottom of the card, adjusting the spacing and alternating paper patterns along the way. 


9.  Based on how I did my spacing I had 8 vertical strips of paper and 13 horizontal strips.  This will vary based on how tight you space and weave the paper.  The goal is to cover the whole face of the card. **The results may vary depending on the width of the strips and how tightly you weave the paper.  


10.  Flip over the weaved paper and apply glue back and forth across the rows of paper.       


11.  Adhere the weaved paper to the front of the card. Line it up so all the edges line up with the base of the card, The horizontal strips will hang over on both sides and need to be trimmed down.    


12.  Flip the card over and cleanly trim off the excess paper strips, using scissors and following the edge of the white cardstock.   


13.  Once the edges are trimmed this is what the front of the card should look like.    


14.  Go around the edges and glue down any strips that are loose.  You want everything completely glued down to the card base.   


15.  Punch a 3" scallop circle out of black card  stock and a 2 ¼” circle out of white card stock.                                     


16.  Layer the white circle on top of the black scallop.  Place the pink vellum die cut on top of the white card stock.  The purpose of backing the vellum with the white card stock is so that the vellum piece shows up better.  


17.  What it should look like with all the shapes layered.


18.  Select the Triangle Sticker from the Title StickerSheet with the sentiment “U Are Simply Wonderful” and layer on to the white card stock. Once layered, the white card stock circle should not show.  


19.  Using Black Diamond Stickles,  embellish the tiny circles on the vellum die cut to add some sparkle.  Use the Silver Stickles to outline the black scallop circle. 

And drumroll please....


You can make this too!  Save this tutorial, visit Fotobella.com for your Basic Grey Sun Kissed supplies and get busy paper weaving!  

Have a fabulous day!  


Monday, January 18, 2016

Graphic 45 Children's Hour Card & Tag Class

Happy New Year Everyone!
Have you ever wanted to make cards and tags just like a designer?  Well, Now you CAN! And you can do it ALL YEAR LONG!
This is ReNae with the FotoBella Design Team, and today on the blog I wanted to share some of the cards and tags you will make when you enroll in our "Children's Hour Card/Tag Monthly Membership with Starter Bundle by FotoBella and Graphic 45".


Each month the class kit will include supplies and directions for 2 cards and 2 tags using the G45 Children's Hour collection calendar collection. 


There will be new techniques and embellishments each month!


Here are the details: 
* You will use product from Children's Hour each month. You will get a starter bundle that will be used through out the year!
* Some months will required some extra Children's Hour papers, which will be included in your monthly kit.
* Each card and tag will use other fun embellishments (but what kind will differ from month to month), also included in your monthly kit.

Check out all the details on the Blog!   This is a fantastic class and you'll have fun making cards ALL YEAR LONG!  
January shipment will be sent out on January 15th, so be sure to sign up HERE!  Happy Crafting!


ReNae

Note: Percentage off coupons do not apply to this item.


Friday, January 15, 2016

Bo Bunny Calendar Girl - Snowball Fight Layout

Did everyone enjoy their Holidays? 
Jeri here, and I had an amazing Holiday in Utah with my family. It was very cold, and there was a lot of snow to play in!

I couldn't resist crafting this Snowball Fight Layout of my darling nephew.

The snowball says it all.


Wednesday, January 13, 2016

Bo Bunny Love & Lace Heart Layout Tutorial

     Are you ready for some romance with a bit of nostalgia? Bo Bunny's new Love & Lace I Want It All Bundle from FotoBella evokes just that! This old photo of my late grandparents was just right for this collection, making this the perfect Christmas present for my Mom.


Supplies:                                                                       Tools:

*Love & Lace 12 X 12 Collection Pack                     *The Crafter's Workshop Texturized Stencil
*Love & Lace Ephemera                                            *Scissors
*Love & Lace Layered Chipboard                             *Heat Gun
*Love & Lace Noteworthy                                         *Glue
*Bo Bunny Floral Stamp                                            *Needle and black embroidery thread
*Love & Lace Buttons                                                *Blending Tool
*Bo Bunny Glitter Paste (Sugar)
*Prima Script and Fence Stamp
*Mists or Sprays (Pinks, burgundy, green, and black)
*Permanent black, red, burgundy, and green inks
*Ranger Black and Verdigris Embossing Powders
*Stickles (Burgundy, Eucalyptus, and Cotton Candy).
*Cheesecloth

 *************************************************
Directions:

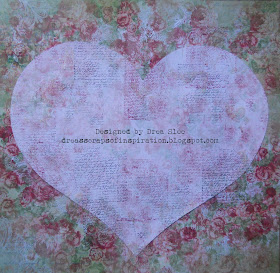
1. Cut heart from the back of the Love & Lace Devotion paper, and glue onto the back of the Love & Lace You & Me paper. Use script stamps in red and black permanent inks, randomly over the heart and background. Apply some splatters and textures with a popsicle stick onto the heart and background with Bo Bunny Glitter Paste (Sugar).


2. Spray heart and background with mists or sprays. I used some pinks, green, and black. 


3. Using the Crafter's Workshop Texturized Stencil, mask the fence design with some black ink. Then add some Ranger Verdigris Embossing Powder to it and heat set with your heating gun. 


4. Glue strips of the pink sheer and polka dots ribbons that come in the Ephemera, under the fence. Now add a piece of the black netting that's recycled from fruit, to the center of the heart overhanging along the bottom.


5. Fussy cut around the lace strip of Love & Lace paper, and use blending tool with Distress Ink (Worn Lipstick) along the scalloped edge. Add a dot of Burgundy Stickles to the ends. Once dry, glue strip right along the bottom of the pink polka dot ribbon. 


6. Matte 4" X 6" photo with Love & Lace Cherish paper, tearing the edges, and inking them with Distress Ink (Worn Lipstick). Use a paintbrush with some water to distress the edges. Punch out the middle of the black floral tag that comes in the Ephemera, and outline the edges with Burgundy Stickles. Make a bow through the tag from strips of cheesecloth that have been colored with mists. Glue tag over the lace border, adding the photo into the frame of it. 


7. Glue 8 rose clusters that have been stamped with black permanent ink onto white cardstock using the Bo Bunny Floral Stamp. Color them first with the Tim Holtz Water Brush Detailer and some Distress Inks. Add Eucalyptus Stickles to the leaves and Cotton Candy Stickles to the flowers. Use the same die you used to cut your heart, as a guide to add some black stitching around the heart. Use black embossing powder to stamp the fence in the lower left corner. 


8. Use the Bo Bunny Floral Stamp to stamp the other roses and leaves using permanent red, burgundy, and green inks. Color again with Distress Inks and the Tim Holtz Water Brush Detailer. Layer your flower by stamping it twice, and cutting near the middle rose. Add water to the edges and curl up your petals. When dry apply some Glitter Paste (Sugar) for some sparkle. Then just glue the smaller rose onto the bigger one, adding the leaves underneath. 


9. Add title tag to the right of the embossed fence. From the Ephemera I used the black metal flower and black ribbon, adding some pink fiber from my own stash. 


10. Add sheer ribbon from the Ephemera to the wood buttons, making a bow to the one on the left, and a loop from the one on the right. 


11. For the final touch, I added the oval metal piece that can also be found in the Ephemera, to the center of the paper lace strip. 


     I hope you'll try some of these techniques on your next page! You can easily simplify this design by eliminating the stitching and replacing the fussy cut stamped flowers with some ready made ones. 


Monday, January 11, 2016

Oh Happy Day Basic Grey Sun Kissed layout

Apryl with the FotoBella design team to share a fun summer layout with Basic Grey's Sun Kissed Collection.  Ok, so who is now dreaming, hoping, wishing for warmer days?  Holy cow, it's only been winter for a few weeks here is So. Cal and I've been freezing!  Yes, I'll admit I was done with the heat, but this freezing business is not what I had in mind!  


So this pineapple was the starting point for this whole layout. It just shouts "Summer!" 


There are some beautiful patterns in this paper, reminds me of a kaleidoscope.  I chose many of them and cut them in squares & rectangles to make a mosaic background for the photos. 


Did some embellishing with the cork stickers, die cuts and stickers to add the finishing touches to the layout.  I had just as much fun making this layout as the kids did carving their names into our picnic table that Daddy built.  

Thanks for stopping by and have a fabulous day!