Wednesday, December 31, 2014

Christmas Canvases

Welcome!  Today I wanted to share with you a collection of small canvases that I made using the Basic Grey Evergreen Bundle from FotoBella.

I started with 2-4x4 white canvases and 1- 3x4 white canvas.  I then painted them with a metallic red color.  Selected the base paper, cut to size and then adhered to the canvas.  From there I selected from all the embellishments in the bundle to create little groupings.  These are hanging right next to my front door.  They make me very happy when I walk through the door.

Overall:
 

A few close-ups:


Have a beautiful day! Smiles, Jessica

Monday, December 29, 2014

Basic Grey-Holly Jolly Christmas

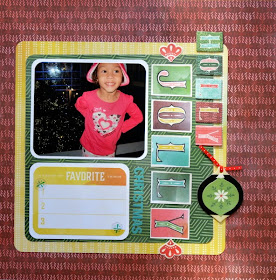
Hello today I am sharing with you a layout I did of my daughter at a Christmas display a couple of years ago.  I used the Basic Grey Evergreen Bundle from FotoBella.

Clean and simple today.  I have to add in my journaling still but I always seem to wait until I have a few layouts piled up and sit down to journal on a few at a time.

Overall:

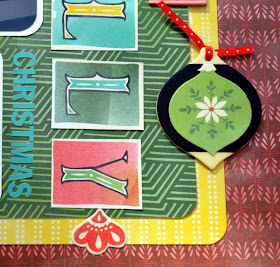
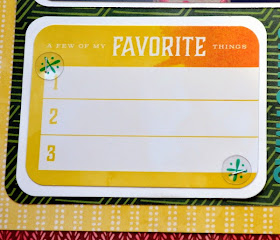
Close-ups:


Have a beautiful day! Smiles, Jessica

Friday, December 26, 2014

Happy Holiday Gift Box Tutorial


Supplies:
December Flourish Page
Chipboard Tag
Die Cut Tags and Flowers
Jute Cord
Ink Pad
Bow
Bell Charm

Tools:
Hot Glue Gun
Paper Cutter
Scissors

With the December Flourish page and the Gift Box Punch, measure and cut your box. I used the 4” x 4” x 3.25” measurement.


Fold your paper on all lines and plug in your hot glue gun.


Glue the box sides.


Fill your box with the gift, and hook the top flaps closed.
 

Punch out some of the Die Cut Flowers. Spritz them with water and distress them. With the hot glue gun, secure each flower on top of one another. Ink the edges slightly.


Wrap the box with Jute.
Hot glue the flower to the box, and add a rhinestone.


Choose a Chipboard Tag and a few Die Cut Tags. Ink edges slightly and tie onto the box with the Jute.
 

Top the gift off with a Bell and festive Bow.
You now have a beautiful custom Gift Box!


Wednesday, December 24, 2014

Bo Bunny Altitude "Skiing in Canada" LO

     Drea here with another project featuring Bo Bunny's awesome Altitude I Want It All Bundle from FotoBella!  Trust me, this is definitely a collection that you'll want all of! Even though I'm not a skier, I wanted to showcase some of the fabulous ski goodies that come in this bundle, so I scrapped this photo of my sister on the slopes in Canada.


          What better inspiration, besides this beautiful photo, than Bo Bunny's sketch for December!


     I started with blue cardstock for the background to bring out the blues in the photo. Then I used white paint for the punched snowflake border and edges of my papers, as well as the title, which was done using the Cargo Alphabet Stencil from Tim Holtz. After stamping the stitched circles, I added the snowflakes that come in the Layered Chipboard pack. The large white snowflake with the flower came from my own stash. I got the Ski Lift circle from the Noteworthy pack, which I placed over the Film Sticker.Then I added a couple of buttons with some fiber through them to finish it up.


Have a great day, and thanks for stopping by!


Deck The Halls Gift Wrap

Countdown to Christmas has ended!! It's time to buckle down, craft your gifts and create custom gift wrap, and it does not have to be stressful, time consuming or difficult.

Here is an easy wrap idea.
I used regular white wrapping paper, spritzed it with some green paint and added a thick gold ribbon. Then, using some of the perfect Graphic 45 Time To Flourish embellishments including chipboard, die cut flowers, tags and pockets, and a journaling card. Top your tag off with a handmade matching tassel with some embroidery thread.


Merry Christmas!


Tuesday, December 23, 2014

Poinsettia Wall Hangings

Welcome!  Today I wanted to share with you a wall hanging that I made using the Basic Grey Evergreen Bundle from FotoBella.

I found these poinsettias place-mats at the store.  I immediately thought they went perfect with my bundle. I just needed to figure out what to do with them. They I realized the would be cute wall hangings.

I started with two 4x6 sheets of paper.  I then created these little collages on each of them and attached them to the place-mats.


Overall:

A few close-ups:


Have a beautiful day! Smiles, Jessica

Sunday, December 21, 2014

It's a Small World

Welcome!  Today I want to share with you some layouts I created using Bo Bunny Candy Lane Collection from FotoBella.

When I saw the pinks in this paper line, I knew it would be perfect for some of the photos from Disneyland.  I have to say if you have never been to see the Christmas lights it is really awesome. It is worth the expensive ticket to get into the park.

Overall:

A few more close-ups:


Have a beautiful day! Smiles, Jessica

Friday, December 19, 2014

Basic Grey Christmas Cards

Jessica here with you today sharing a couple of quick Christmas cards I put together using the Basic Grey Evergreen Bundle from FotoBella.

The finished cards are 5x5, my favorite go to size.  2 cards down, and too many still to go.

Overall:

A few close-ups:


Have a beautiful day! Smiles, Jessica

Wednesday, December 17, 2014

Family Holiday Layout

Hello, it's Apryl with FotoBella's Design Team!  With the Christmas season upon us, I've been busy scrapbooking holiday photos.  Today's layout is made with We R Memory Keepers North Pole I Want It All Bundle from FotoBella.com.  The bundles are fabulous and this one will not disappoint.  FotoBella bundles have a TON of paper in them, not to mention all the embellishment goodies that go along with it.  


Don't you just love these script alpha stickers?  They make such stunning titles.  And of course I had to break out the Stickles and add some sparkle!  What's a holiday layout with a little glitter?!?


I got a lot more photos on this page by using my circle stamp to crop out the backgrounds of the photos and draw the focus to our faces.  


Happy Holidays everyone!  Hope they are full of your own fun family times!

Have a fabulous day!


Monday, December 15, 2014

Hannah's Happy Happy So Very Lovely Good Day Layout

Every time I picked up the Vivienne "I want it All!" Bundle from FotoBella, I found that it made me feel happy!  So I thought, "what better paper to use for this special photo of a very special little girl, than Vivienne, by Basic Grey?"  I found that it reflected perfectly the mood of this particular day, Hannah's special day spent camping with her Dad.

The  pretty colors of patterned paper go with almost any event you want to document, and the textures of the various chipboard pieces. acetate overlays, and resin flowers will add lots of dimension to your project.  

I just built  the "flower frame" around the photo image, using all the wonderful embellishments that come with the 
Vivienne I want it All! Bundle

Everything you could possibly want for a beautiful scrapbook layout is here! Vivienne's Bundle includes chipboard pieces, acetate overlays, resin flowers, die cuts and transparencies, and they all coordinate beautifully!

I can almost feel the fresh air, smell the flowers, and hear the birds chirping as it takes us back to that summer day so long ago...Hannah's happy happy, so very lovely good day!
  

Vivienne I want it all Bundle, makes any project a breeze, and is a great way to document your own 
"Happy Happy So Very Lovely Good Day"!


Happy Creating!
ReNae

Saturday, December 13, 2014

Bo Bunny Altitude Card With A View Tutorial

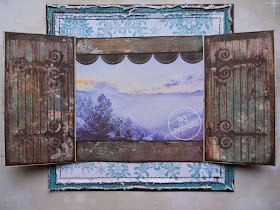
     Drea here with a card tutorial using Bo Bunny's beautiful new Altitude I Want It All Bundle from FotoBella. I love the rustic charm of this collection, and decided to bring the doors to life in this winter card that can be used for so many occasions.


Supplies from Bundle:                                                           Tools:
12 x 12 Collection Pack                                                            Sewing Machine
Ephemera Pack                                                                          Tim Holtz Paper Distresser

Other Supplies:
Glue
2 Brown Brads
Distress Ink (Walnut Stain)
Distress Embossing Powder (Vintage Photo)
String or Twine
Ribbon
Dark Brown Cardstock

1. Using the Rustic paper that comes in the 12 x 12 Collection Pack, cut out the doors leaving 1/2" around the sides, and crease along the side edges. Cut the same doors without the 1/2" edge from the other sheet of paper, since the pack comes with two sheets each. This will be for the inside.


2. Cut along the center of both sets of doors and ink around the edges using Distress Ink (Walnut Stain).


3. Cut the snowy mountain image from the top of the "Flurry" paper, leaving 1/4" along the bottom. I left a smaller amount, but it still worked. Apply the brown scallop sticker, which also comes in the collection pack, to the top of your image.


4. Cut two strips of the wood "Blizzard" paper about 1/2" wide, and the same length as your mountain image. Use the same ink along the edges, and glue to the top and bottom of your image, slightly overlapping the bottom edge and scallop border.


5. Fold the creases back on the door fronts, and glue to the back of the mountain image. Attach your brads to the fronts, using Distress Embossing Powder (Vintage Photo) on them, for added texture and rust. Tie some string or twine to one of the brads, and wrap around the other to keep your doors closed.


6. Cut a 6" x 6" card out of dark brown cardstock. Cut the same size from the turquoise lined paper that comes in the Ephemera pack, and distress the edges using the Tim Holtz Paper Distresser. Glue to your card and sew around the edges using dark brown thread. Then cut a smaller square from the snowflake "Bundled" paper, distressing the edges again. Add a ribbon to the middle and sew around the edges. 


7. Open your doors and glue the other set of doors to the back, to cover the backs of the brads, and glue to the center of your card. Here is your inside view!


Thanks for looking, and have a great day!